.svg)
FileCloud does not provide support for ClamAV or its virus signature databases, which are third-party software applications. If you need assistance with your ClamAV configuration or setup please check the ClamAV Troubleshooting FAQ.
ClamAV integration with Azure/S3 external networks is not supported.
You can configure FileCloud to scan uploaded files using ClamAV, an open source antivirus software.
ClamAV is available for:
-
Windows
-
Linux
When a virus is detected in an uploaded file, the following actions occur:
-
The incoming file is deleted.
-
An alert is displayed in the admin portal.
-
A toast is displayed in the user portal.
-
An entry is added in the audit log about virus detection in the file and subsequent deletion of the file.
To Use ClamAV
Install ClamAV in Ubuntu

To install ClamAV in Ubuntu:
-
Install the ClamAV package
sudo apt-get install clamav-daemon -
You might need to run 'freshclam' to update the antivirus database files
sudo freshclam -
Update the ClamAV-Daemon mode to use TCP, by running the sudo dpkg-reconfigure clamav-base
sudo dpkg-reconfigure clamav-daemon -
In the reconfigure wizard, choose Socket Type TCP and Interface as localhost to listen to.
-
After reconfigure finishes, verify the clamd.conf file is setup correctly (/etc/clamav/clamd.conf)
NOTE: TCPAddr localhost may not work. You can enter the filecloud URL in place of TCPAddr to make it workTCPSocket 3310 TCPAddr localhost StreamMaxLength 100M -
Additional commands for Ubuntu 16
#The Socket Configuration changes are also required as below: #Edit the file /etc/systemd/system/clamav-daemon.service.d/extend.conf [Socket] SocketUser=clamav ListenStream=/var/run/clamav/clamd.ctl SocketGroup=clamav SocketMode=666 ListenStream=xx.xx.xx.xx:3310 # Note that xx.xx.xx.xx = IP address of server or 127.0.0.1 #After that run: systemctl --system daemon-reload systemctl restart clamav-daemon.service -
Start ClamAV-Daemon
sudo /etc/init.d/clamav-daemon start
Install ClamAV on Windows
-
The native ClamAV version does not have a GUI.
-
The virus database definition can be updated using freshclam using a Windows task scheduler.
To install ClamAV on Windows:
-
Download the latest version of the ClamAV installer from:
http://www.clamav.net/downloads -
Install ClamAV by running the latest msi file downloaded.
-
Download the nssm Service Manager from:
https://patch.codelathe.com/tonidocloud/live/3rdparty/nssm/nssm.zip -
Unzip the nssm folder and move the nssm folder to the C:\ drive.
-
Navigate to the nssm folder in the command line and run the following command:
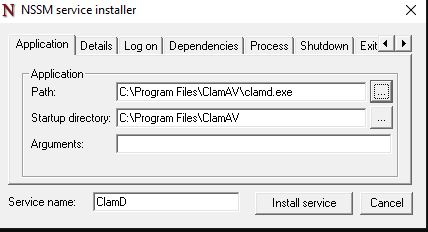
C:\nssm>nssm install ClamDThe nssm service install tool window opens:
-
To install the service, select the clamd.exe file path in Application Path and click Install Service.
-
Copy clamd.conf.sample and freshclam.conf.sample from C:\Program Files\ClamAV\conf_examples to C:\Program Files\ClamAV, and rename them clamd.conf and freshclam.conf
-
In clamd.conf and freshclam.conf, comment out the line beginning with Example.
-
If ClamAV is installed on a server other than the FileCloud server:
Bind the IP address of the server in clamd.conf by changing the IP address for TCPAddr.
-
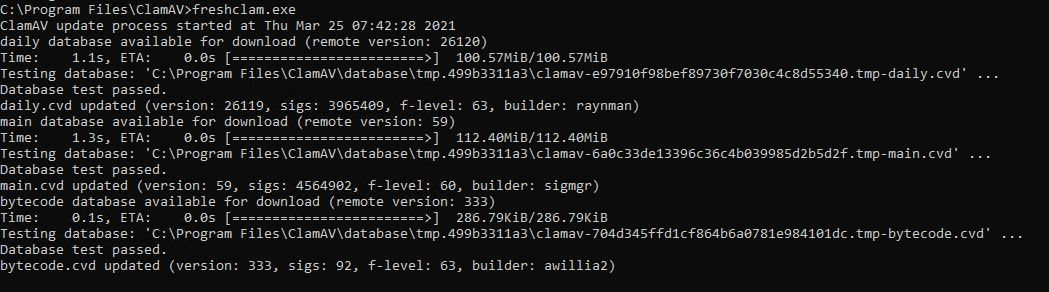
To update the ClamD database, enter:
cd C:\Program Files\ClamAV
freshclam.exe
The console response should appear similar to:
-
Start the service ClamD from Windows Services.
-
Verify the service is running and bind it to the localhost IP address or the IP address of the ClamAV server by running the following command:
netstat -ano |findstr 3310
Integrate ClamAV with FileCloud
Once ClamAV is set up and started, add details of the ClamAV service to FileCloud.
To integrate ClamAV with FileCloud:
-
In the FileCloud admin portal's left navigation bar, scroll down and click Settings. Then, on the Settings navigation page, click Third Party Integrations

The Antivirus page opens by default. -
In Anti-Virus Type, choose Clam AV.
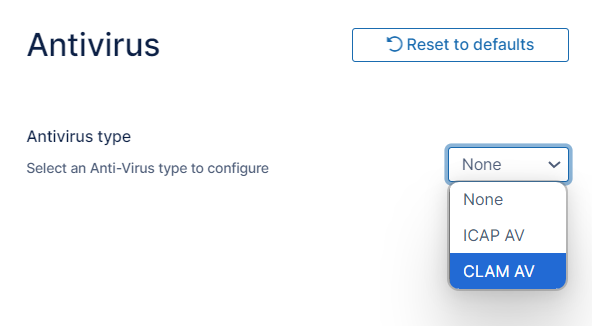
Clam Antivirus settings appear.
-
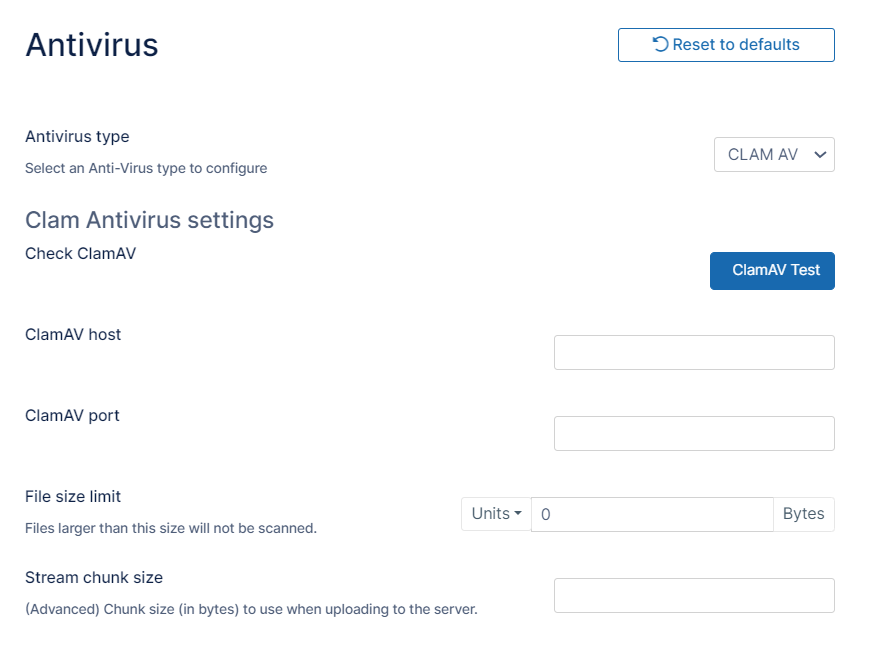
Enter the following information:
Setting
Description
ClamAV Host
Enter the URL or IP of the system where Clam AV is running. This can be local or remote system.
ClamAV Port
The port used by ClamAV (This is set when ClamAV is installed in the previous section)
Skip scanning for files greater than
This is the file limit in bytes that will be scanned. For example, very large files can be excluded from scanning. Default value is 25MB
Stream Chunk Size
This is a advanced setting used to stream the file content to ClamAV for scanning. Default is 8KB.
-
Click Save.
-
To verify connectivity, click the ClamAV Test button.
Once the ClamAV configuration is set up, every file uploaded to FileCloud will be scanned before being added to FileCloud storage.
-
If a file fails AV check (i.e. a virus detected) then the file will be deleted and an entry will be added to the Audit log with the details of the file.
If scanning fails
If scanning fails because the ClamAV server is down, a message appears on your screen, and your Manage Alerts page displays the warning:
Unable to communicate with ClamAV Server. Check immediately.
By default, if ClamAV fails to scan a file because the ClamAV server is down, the file is not deleted.
To automatically delete files if ClamAV scan fails because the ClamAV server is unavailable:
-
Open the configuration file:
Windows: XAMPP DIRECTORY/htdocs/config/cloudconfig.php
Linux: /var/www/config/cloudconfig.php -
Add the line:
define("TONIDOCLOUD_CLAMAV_DELETE_ON_SCAN_FAIL", "1");Now, when scan fails, the file is deleted, and the audit log displays the message: ClamAV removed [FILE_PATH] due to scan fail.
If TONIDOCLOUD_CLAMAV_DELETE_ON_SCAN_FAIL is enabled and the CLAMAV server is not available, FileCloud does not allow files to be uploaded.