.svg)

Do you have an error code?

TCP Port Exhaustion
Problem
When a client initiates a TCP/IP socket connection to a server:
-
The client typically connects to a specific port on the server and
-
The client requests that the server respond to the client over an ephemeral, or short lived, TCP or UDP port.
Under certain conditions it is possible that the available ports in the default range will be exhausted.
In that condition:
-
no new connection can be opened
-
server connections will hang
Cause
The following conditions can cause excessive ports to be left in TIME_WAIT state:
A busy site that exposes Network Folders with NTFS permissions using the FileCloud NTFS Helper Service. If there are lot of users online at the same time, it can cause a lot of HTTP connections to the Helper service that after processing are left in CLOSE_WAIT/TIME_WAIT state. These connections eventually get cleaned up but if there are thousands of connections being made every second then it is possible all available TCP ports get exhausted. Restarting the Helper Service/Webserver will clean up all connections immediately.
Many open connections to MongoDB that are used and closed quickly might leave many open connections that might exhaust all available TCP ports. Processes that might do this include Helper Service (for realtime sync), FileCloud Cron Task etc
Sync App using Explorer Sync Extension to display icon overlays. This is done using many quick TCP/IP calls for inter process communications leading to possible port exhaustion. on the client machine.
Sync/Drive/Automation Apps that try to connect and disconnect from the server many thousands of times (due to error conditions etc) might exhaust available TCP ports on the client and server machine.
Resolution
First try to get a list of open connections to see if this is the problem.
To get a list of open TCP connections in TIME_WAIT state:
-
Open the command prompt.
-
Run one of the following commands depending on which OS you are using:
Windows:
netstat -a -n | find /C "TIME_WAIT"
Linux:
netstat -n | grep -c TIME_WAIT
If this is a consistent issue on your FileCloud Server, you can use one of the following resolutions depending on which OS you are using:
Only change this behavior if requested by Tech Support.
|
LINUX Admins: |
|
|
To change the port range you can do the following: |
echo "32768 61000" >/proc/sys/net/ipv4/ip_local_port_range |
|---|---|
|
To change the default time for a TCP socket to be in TIME_WAIT (it will become 30 seconds by modifying the settings in the following procedure: |
echo 30 > /proc/sys/net/ipv4/tcp_fin_timeout |
|
Depending upon the OS, you might need to restart the Networking under Linux for the changes to apply. |
|
|
WINDOWS Admins:
HKEY_LOCAL_MACHINE\SYSTEM\CurrentControlSet\Services\Tcpip\Parameters 3. Add a new MaxUserPort key and set it to: DWORD Value between 5000 and 65534. You can use a value like 32000 to specify the number of ports to be used by user processes. 4. Add a new TcpTimedWaitDelay key, and set it to: DWORD Value between 30 to 240. You can use a value like 30 second. The default time for TCP socket to be in TIME_WAIT will become 30 seconds instead of the 4 minute default. 5. Close regedit and save your changes. 6. After editing, reboot the server. |
SMTP Troubleshooting
Problem
When using Microsoft Exchange Server with Two-Factor Authentication, the user never receives an email with a confirmation code.
Cause
When using Microsoft Exchange Server, Two-Factor Authentication cannot send a verification email.
Resolution
To reset SMTP settings:
-
To be able to access login without using two-factor authentication, perform an Admin Password Reset.
-
In the FileCloud admin portal's left navigation bar, scroll down and click Settings. Then, on the Settings navigation page, click Email

The Email settings page opens. -
On the EMAIL tab, to configure the Email Settings, disable SMTP AUTH enabled.
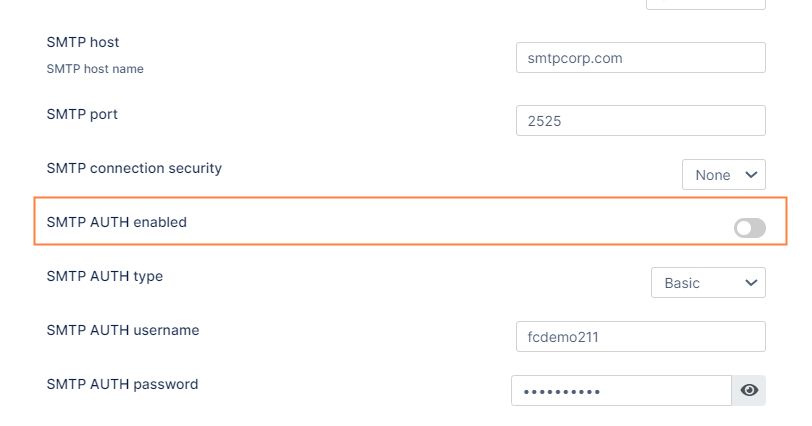
4. Click Save.
You should be able to receive email with a confirmation code now.