.svg)
The following options are available for sharing a folder:
-
Allow anyone with link (Public Share). No FileCloud account required.
-
Anyone anyone with link and a password (Protected Public Share). No FileCloud account required.
-
Allow selected users or groups (Private share). FileCloud account required. The shared folder appears in the Shared with Me folder.
In addition, it is possible to control user access to the shared resource with read, write, or share permissions.
You can use the FileCloud app to share folders on your mobile device with others. You can:
-
Create a direct link to the folder. This link can be sent via email to anyone who needs access to that resource.
-
Let FileCloud notify the users who you add to the share.
To share a folder:
-
Open the FileCloud App.
-
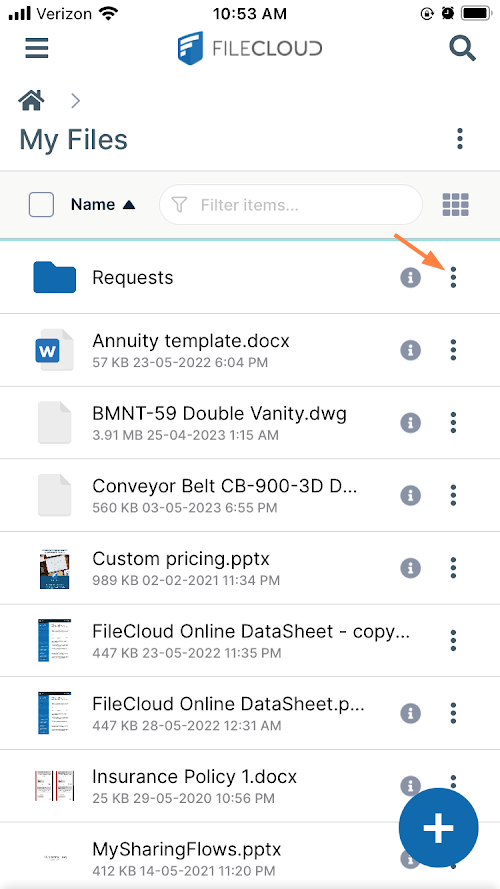
Navigate to the folder you want to share.
-
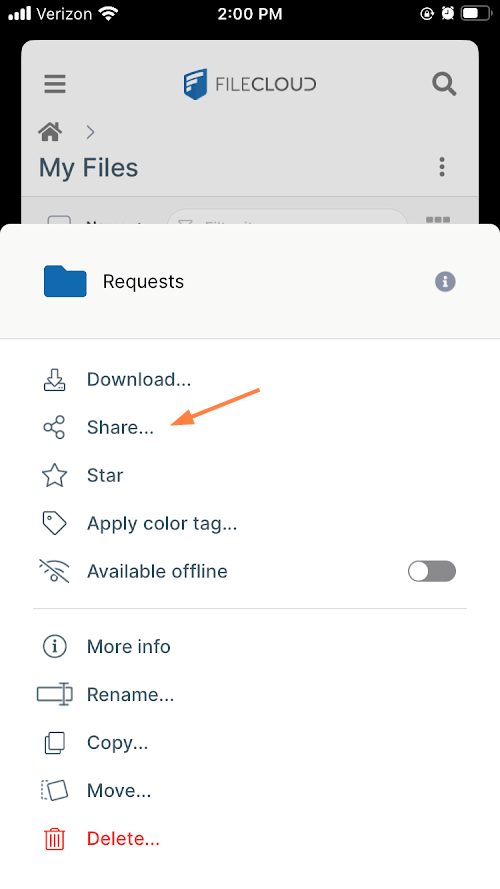
Tap the more icon next to the folder.

-
Tap Share.
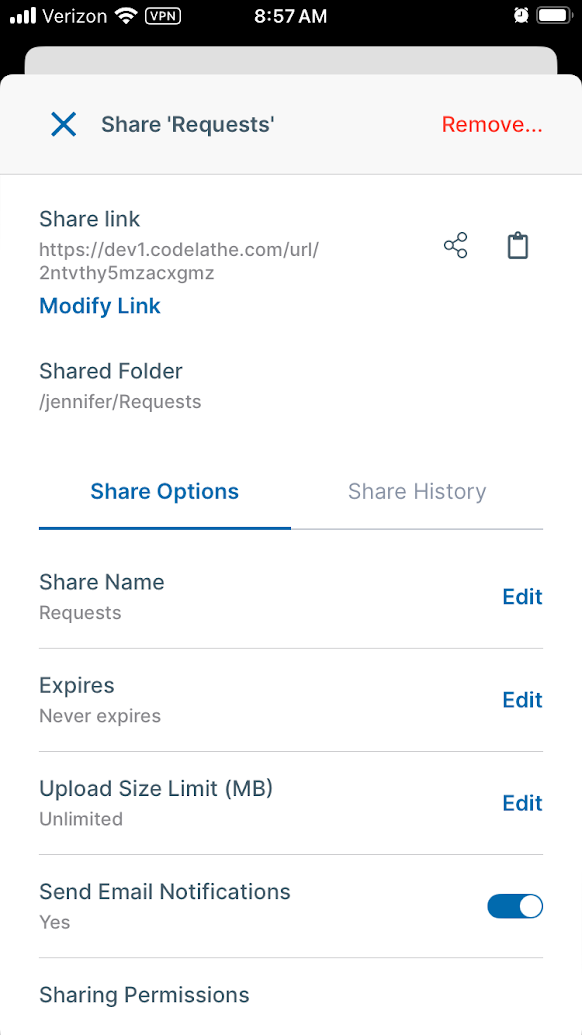
The folder is automatically shared privately although no share recipients have been added yet. A screen for accessing the share options and copying/sending the share link opens.
To copy the share link:
Click to expand...
To copy the folder share link:
-
Tap the Copy icon.
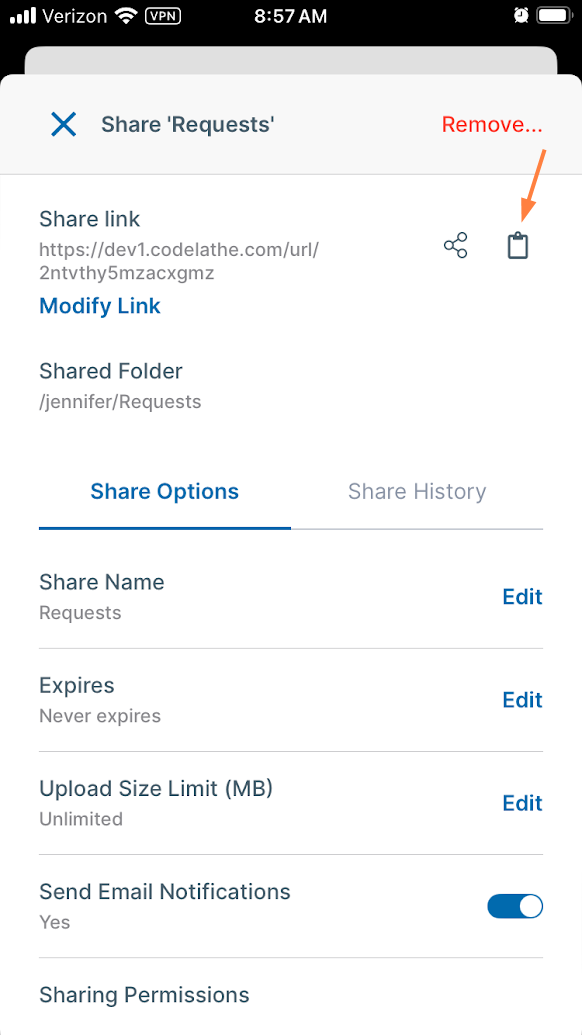
The screen displays the message Share link copied. -
Paste the link into an email or text message and send it.
To change folder share options:
Click to expand...
The options for a share are listed under Share Options:
.png?cb=1fb4861e7212062d9313496bb9cd97c2)
For information on setting share options, see:
Share Options for Public and Private Folders
To add users to a private share:
Click to expand...
If you can't see the Users and Groups tabs, scroll to the bottom of the screen.
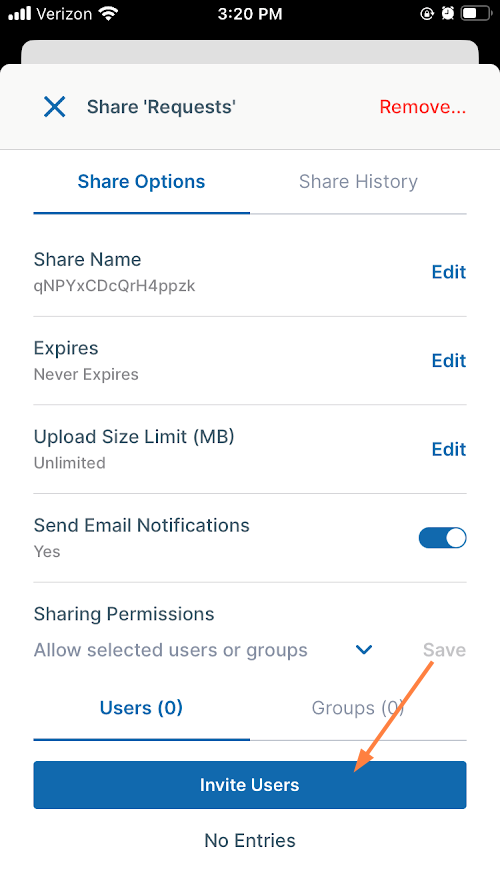
To add a user to a private share:
-
Tap Invite users.
-
Enter a username or email that exists in your system, or enter a new user's email, and tap Add Users.
If you enter a new user, FileCloud sends them an email with the share link and asks them to create a FileCloud account to access the link.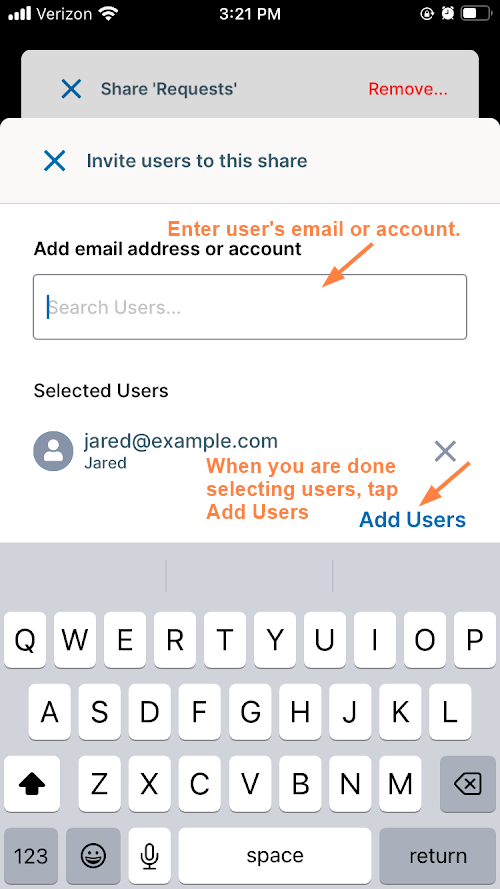
The user is added to the share.
To change a user's private share permissions:
Click to expand...
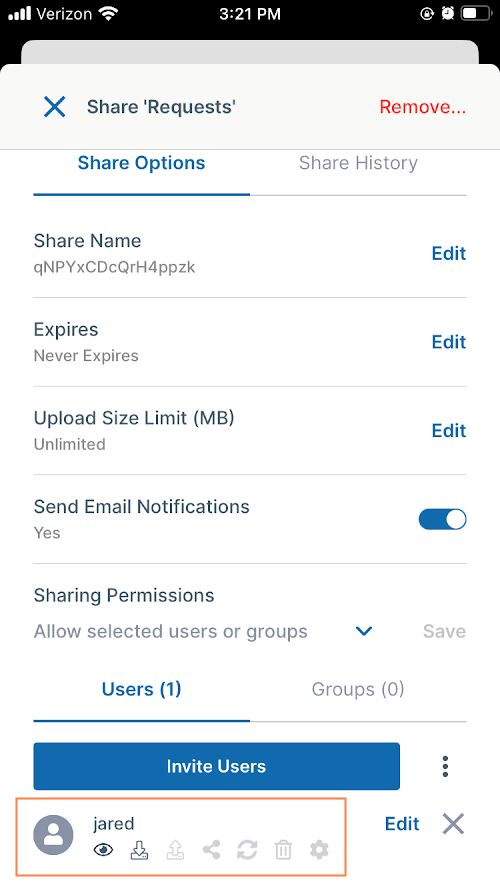
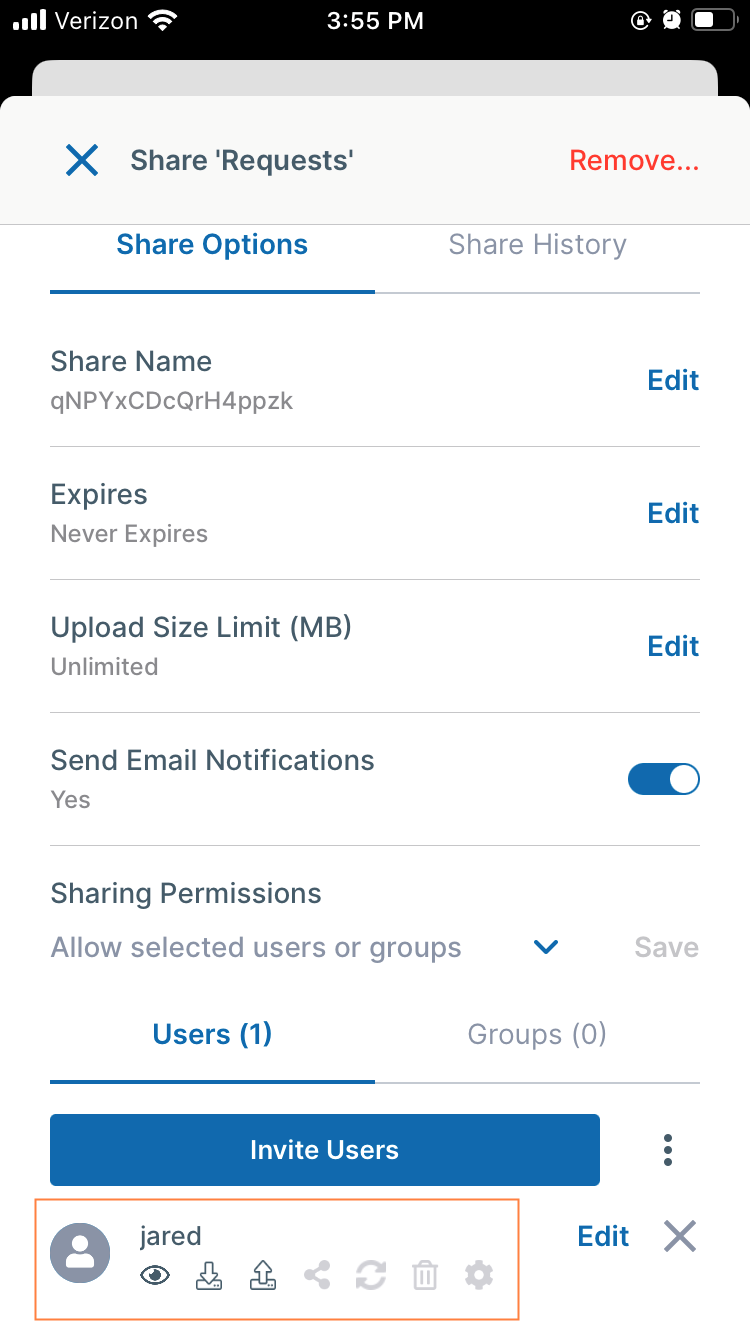
When you privately share a folder with a user, the user's permissions for the folder are shown in icons below the username or email. By default, the user has view and download permissions for the folder.
You can also give the user upload and share permissions, and if they are allowed in your system, sync and delete permissions. Note that other settings in FileCloud affect which permissions are available.
To change the user's permissions for the folder:
-
Across from the user's name or email, tap Edit.
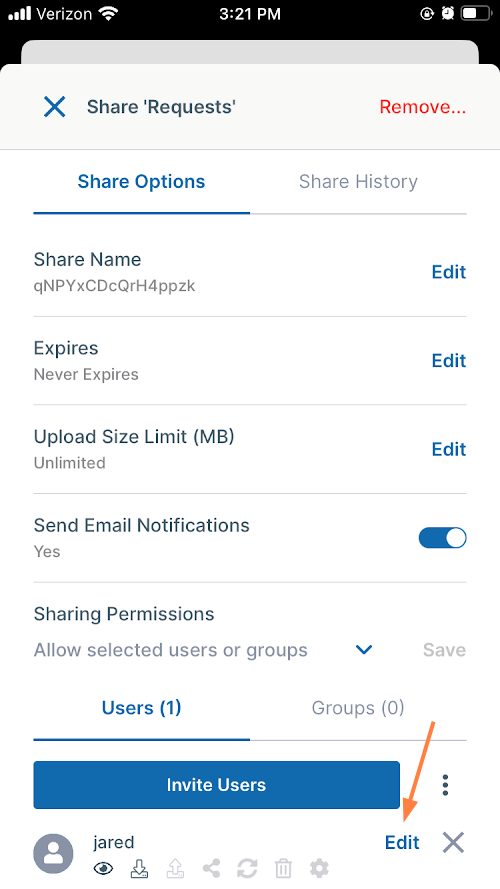
A popup shows the available permissions.
-
Check or uncheck permissions, and tap Apply.
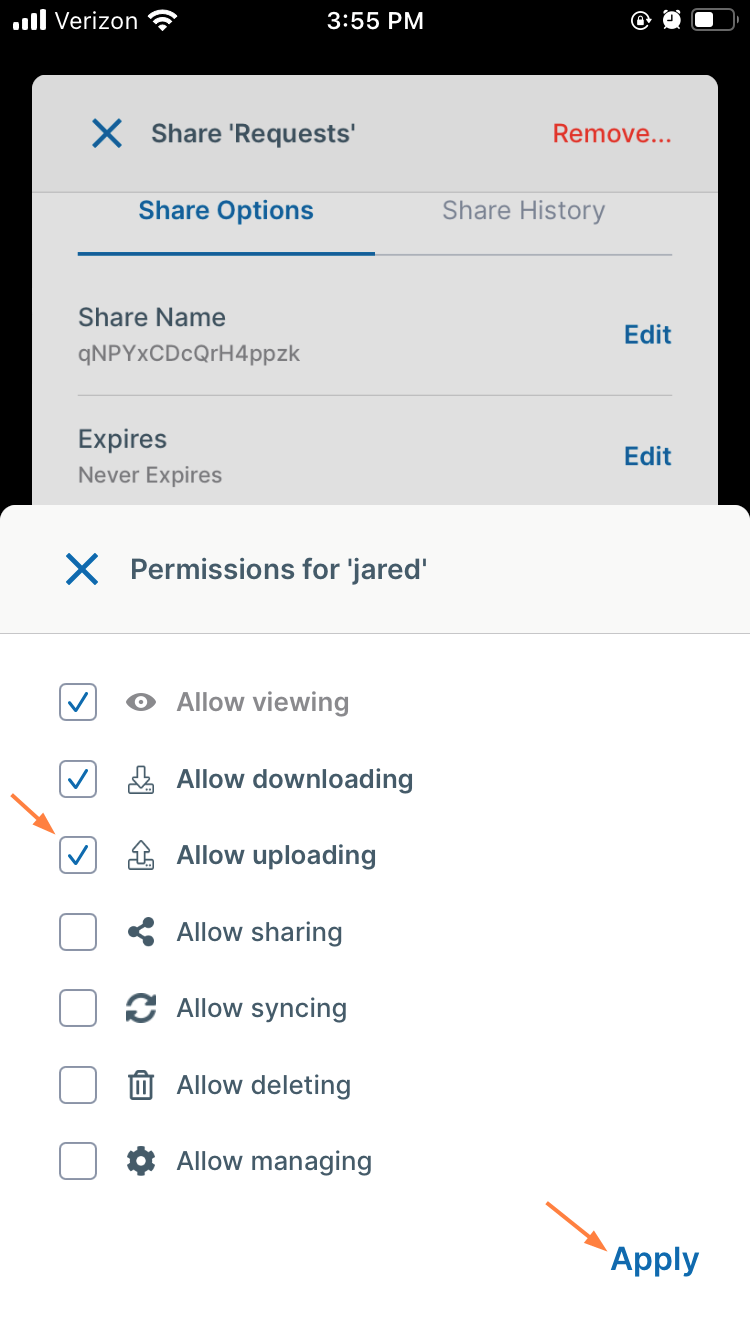
The changes to the permissions are saved.
To add groups to a private share:
Click to expand...
To add a group to a private share:
-
Tap the Groups tab, and then tap Add Group.
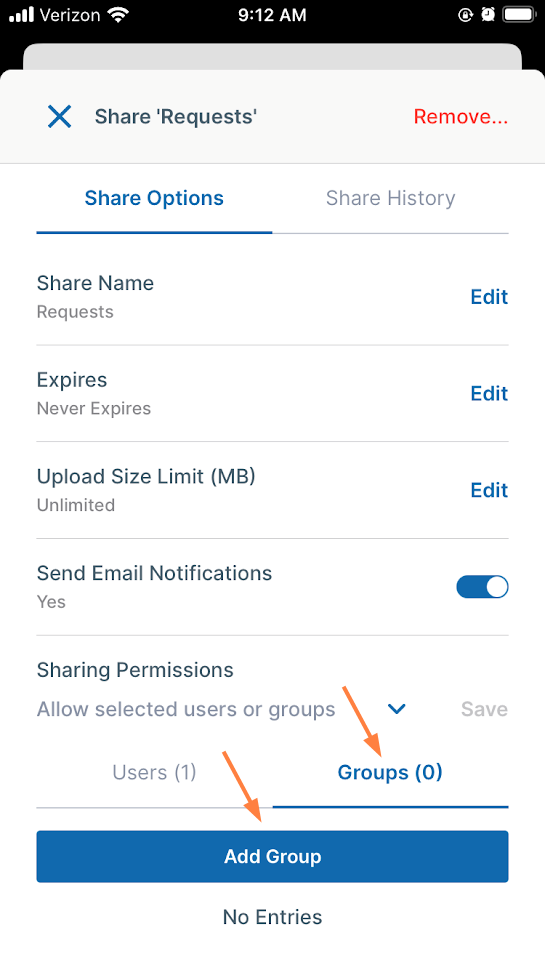
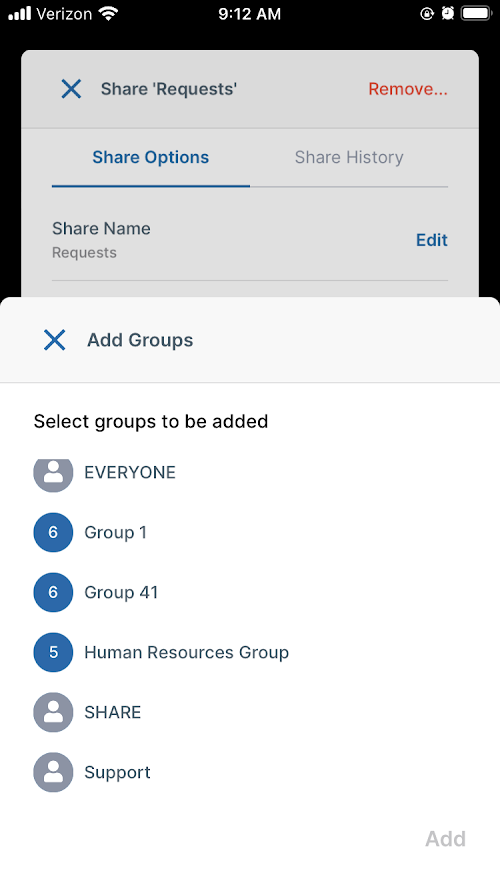
The groups that are available for you to add to the share appear. -
Tap each group that you want to add to the share.
-
When you are done selecting groups, tap Add.
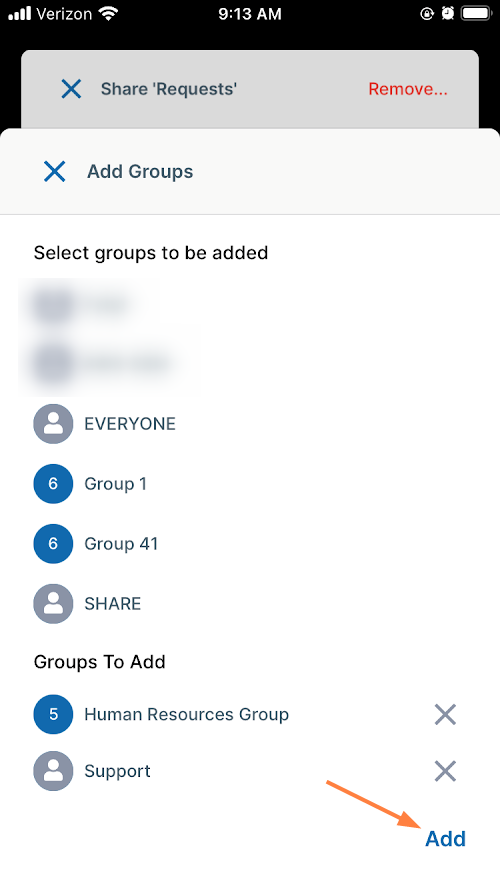
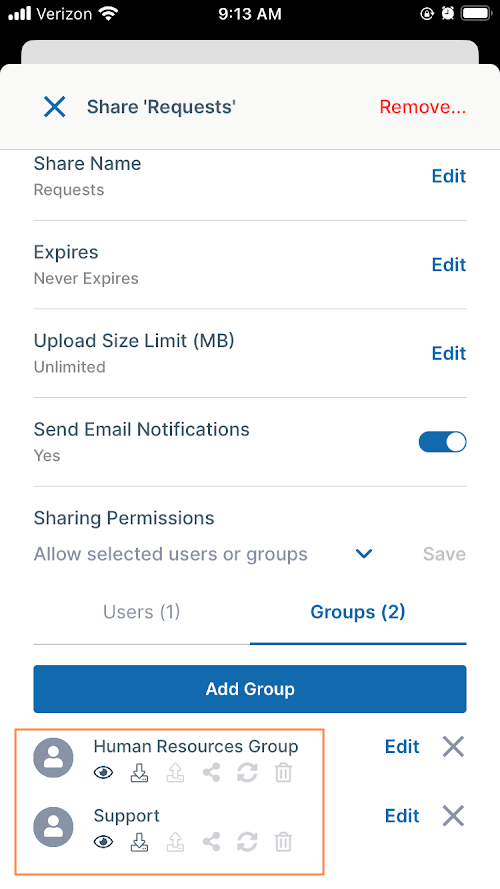
The groups are added to the share:
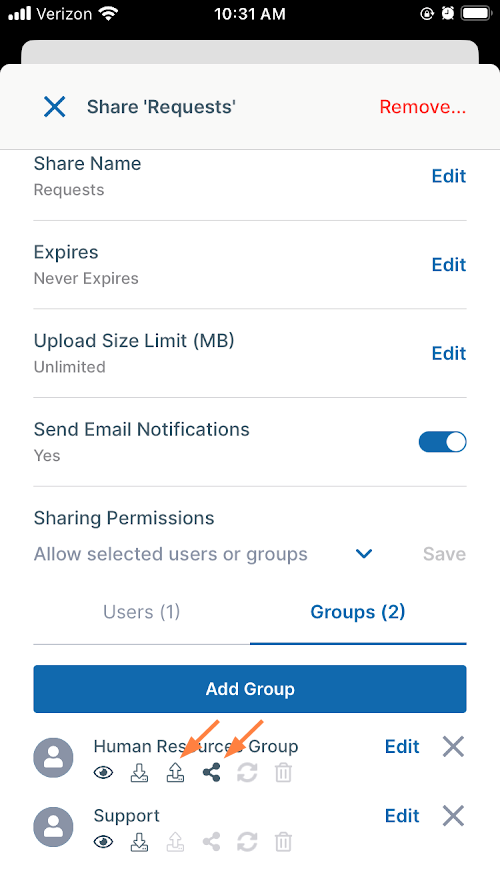
To change a group's private share permissions:
Click to expand...
When you privately share a folder with a group, the group's permissions for the folder are shown in icons below the group name. By default, the members of the group have view and download permissions for the folder.
You can also give the group upload and share permission, and if it is allowed in your system, sync and delete permissions.
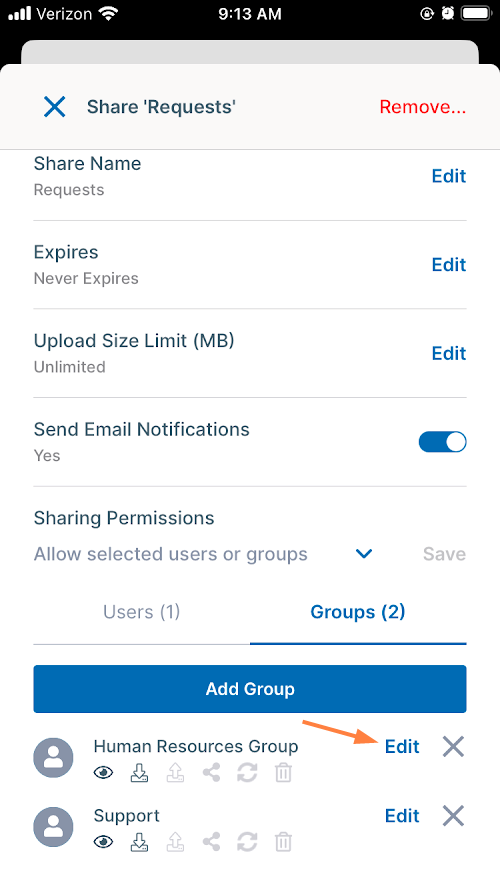
To change the group's permissions for the folder:
-
Across from the group, tap Edit.
-
A popup shows the available permissions.
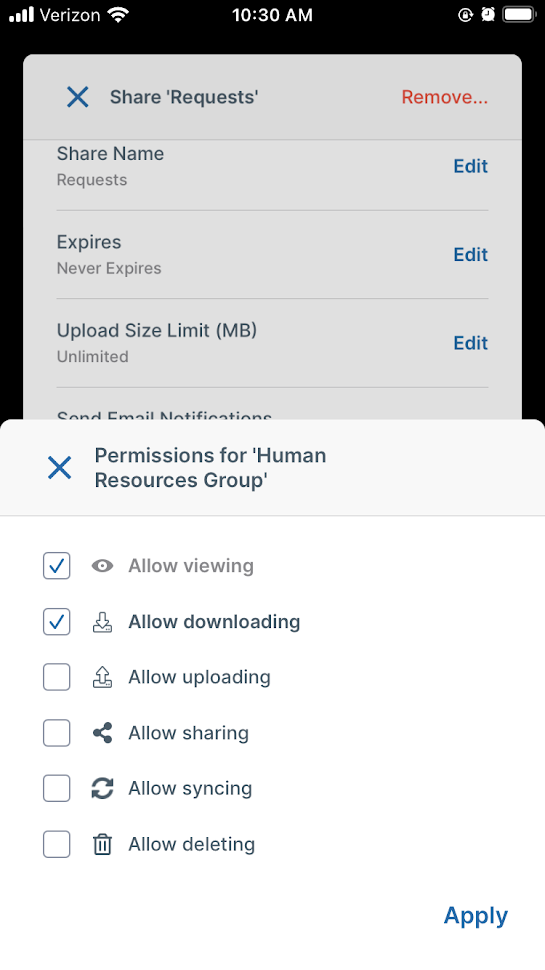
-
Check or uncheck permissions, and tap Apply.
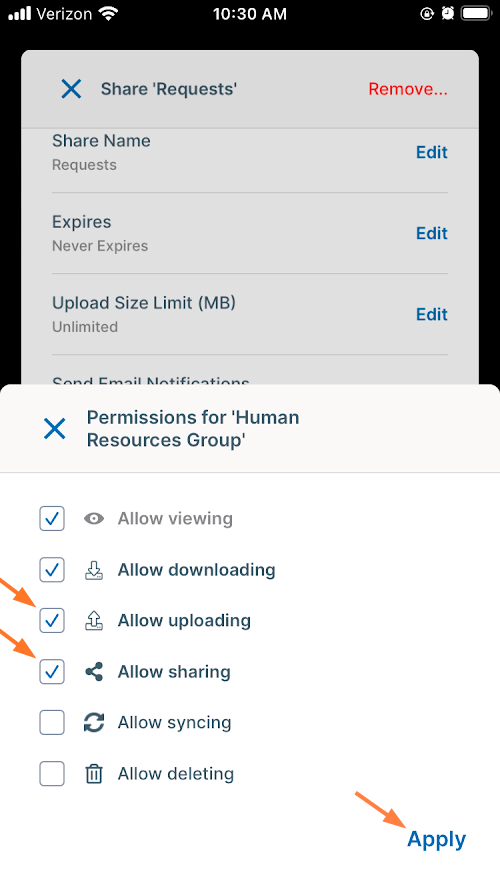
The changes to the permissions are saved.
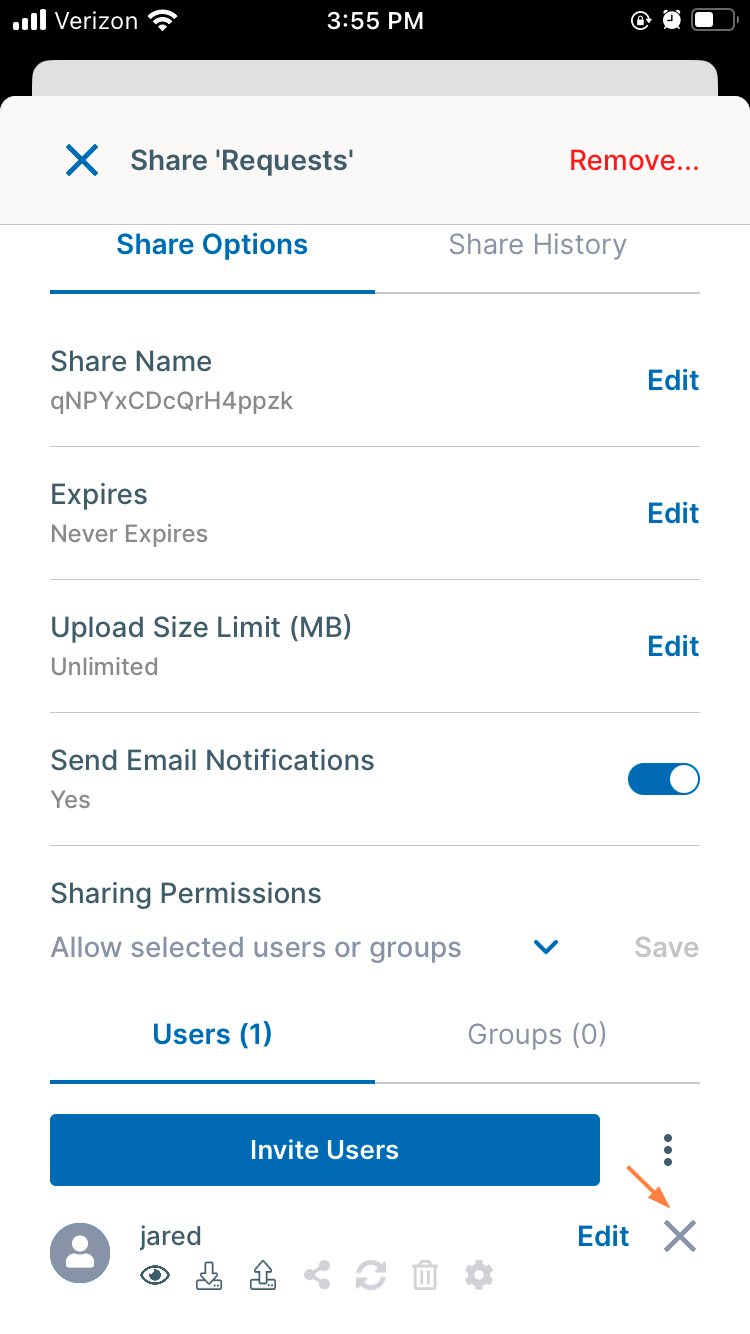
To remove a user or group from a share:
Click to expand...
To remove a group or user from a share, tap the x next to it:
To make a share public:
Click to expand...
To change a private folder share to public:
-
Click the arrow beside your current Sharing Permissions choice.
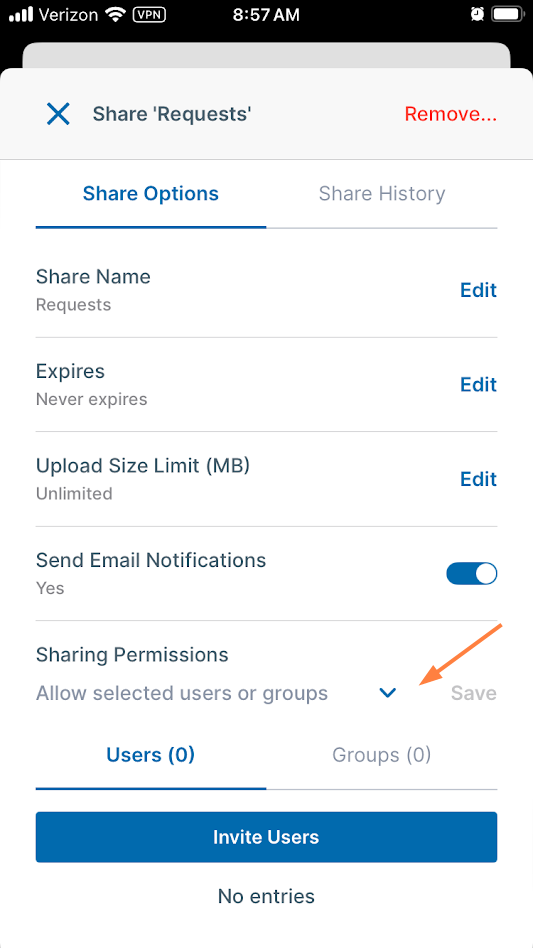
The options Allow anyone with link, Allow anyone with link and a password, and Allow selected users or groups appear. -
Tap Allow anyone with link and a password to create a public share that requires a user to enter a password to access it.
or
Tap Allow anyone with link to create a public share that does not require a user to enter a password to access it.
In this example, we choose Allow anyone with link and a password.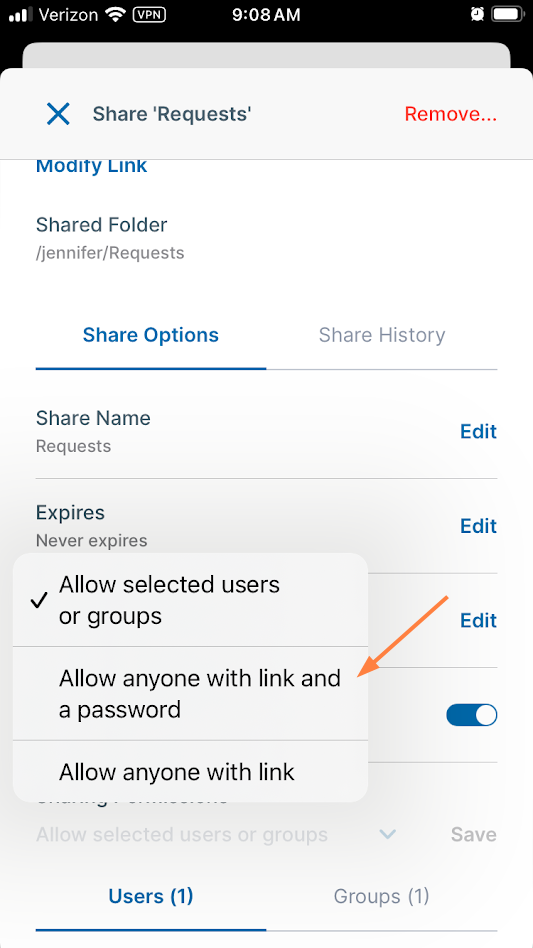
Allow anyone with link and a password now appears under Sharing permissions. -
Tap Save, and then tap OK.
Since we chose Allow anyone with link and a password, a Password field that is filled with an auto-generated password appears. To view the password, click the eye icon. To change the password, type over it and click Save.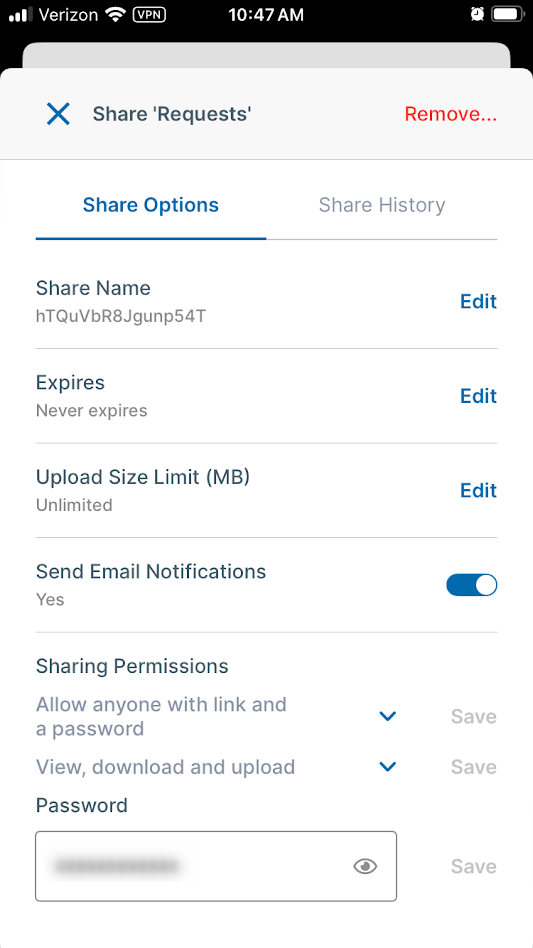
To change the permissions on a public share
Click to expand...
For public folder sharing, the following permissions are available. By default, the share has View + Download permission, but you may change it.
|
Permission |
Effect |
|---|---|
|
View + Download (default) |
Users can browse existing files and download files to the folder. |
|
View + Download + Upload |
Users can browse existing files, download files and upload files to the folder. |
|
View + Upload |
Users can browse existing files, preview files (not download) and upload files to the folder. |
|
View Only |
Users can only browse existing files, and preview files in the folder (not download). |
|
Upload Only |
Users cannot browse existing files, but only upload files. It is like an upload-only FTP folder.
|
To change the share permission for a folder:
-
Tap Share Options.
.png?cb=7bea735ff07148149eae45671cf30455)
The share screen expands. -
Under Sharing Permissions, tap the current permissions (such as View and Download).
.png?cb=405fc38cd3defb96997e4d76f5f3f642)
Permission options open. -
Tap one of the permission options.
.png?cb=96f09870801084e811c2254071fe31ed)
The permission appears changed. -
Tap Save to save the changed permission.
.png?cb=aadd920a9543c9edc4167fa40f80cb42)
To remove a folder share:
Click to expand...
You can remove folder shares that you have created.
To remove a folder share:
-
Open the FileCloud app.
-
Navigate to the folder whose share you want to remove.
-
Tap the more icon next to the folder.
-
Tap Share.

The share details open. -
Tap Remove.
.png?cb=63b2c21742d346dd8ea8fce3360d8ffb)
The share is removed. Users who were given access to the share can no longer view it in their Shared with me folder or access it through the share link.
To share files on iOS, see Share an iOS File.
For more detailed information about file and folder shares, see Sharing Files and Folders.