.svg)
Before completing the following procedures, configure Apache Web Server. See SSO Configuration Step 1 on the page SAML Single Sign-On Support for configuration instructions.
This article describes how to integrate PingOne as an SSO provider with FileCloud.
Configuration in Ping Identity portal
-
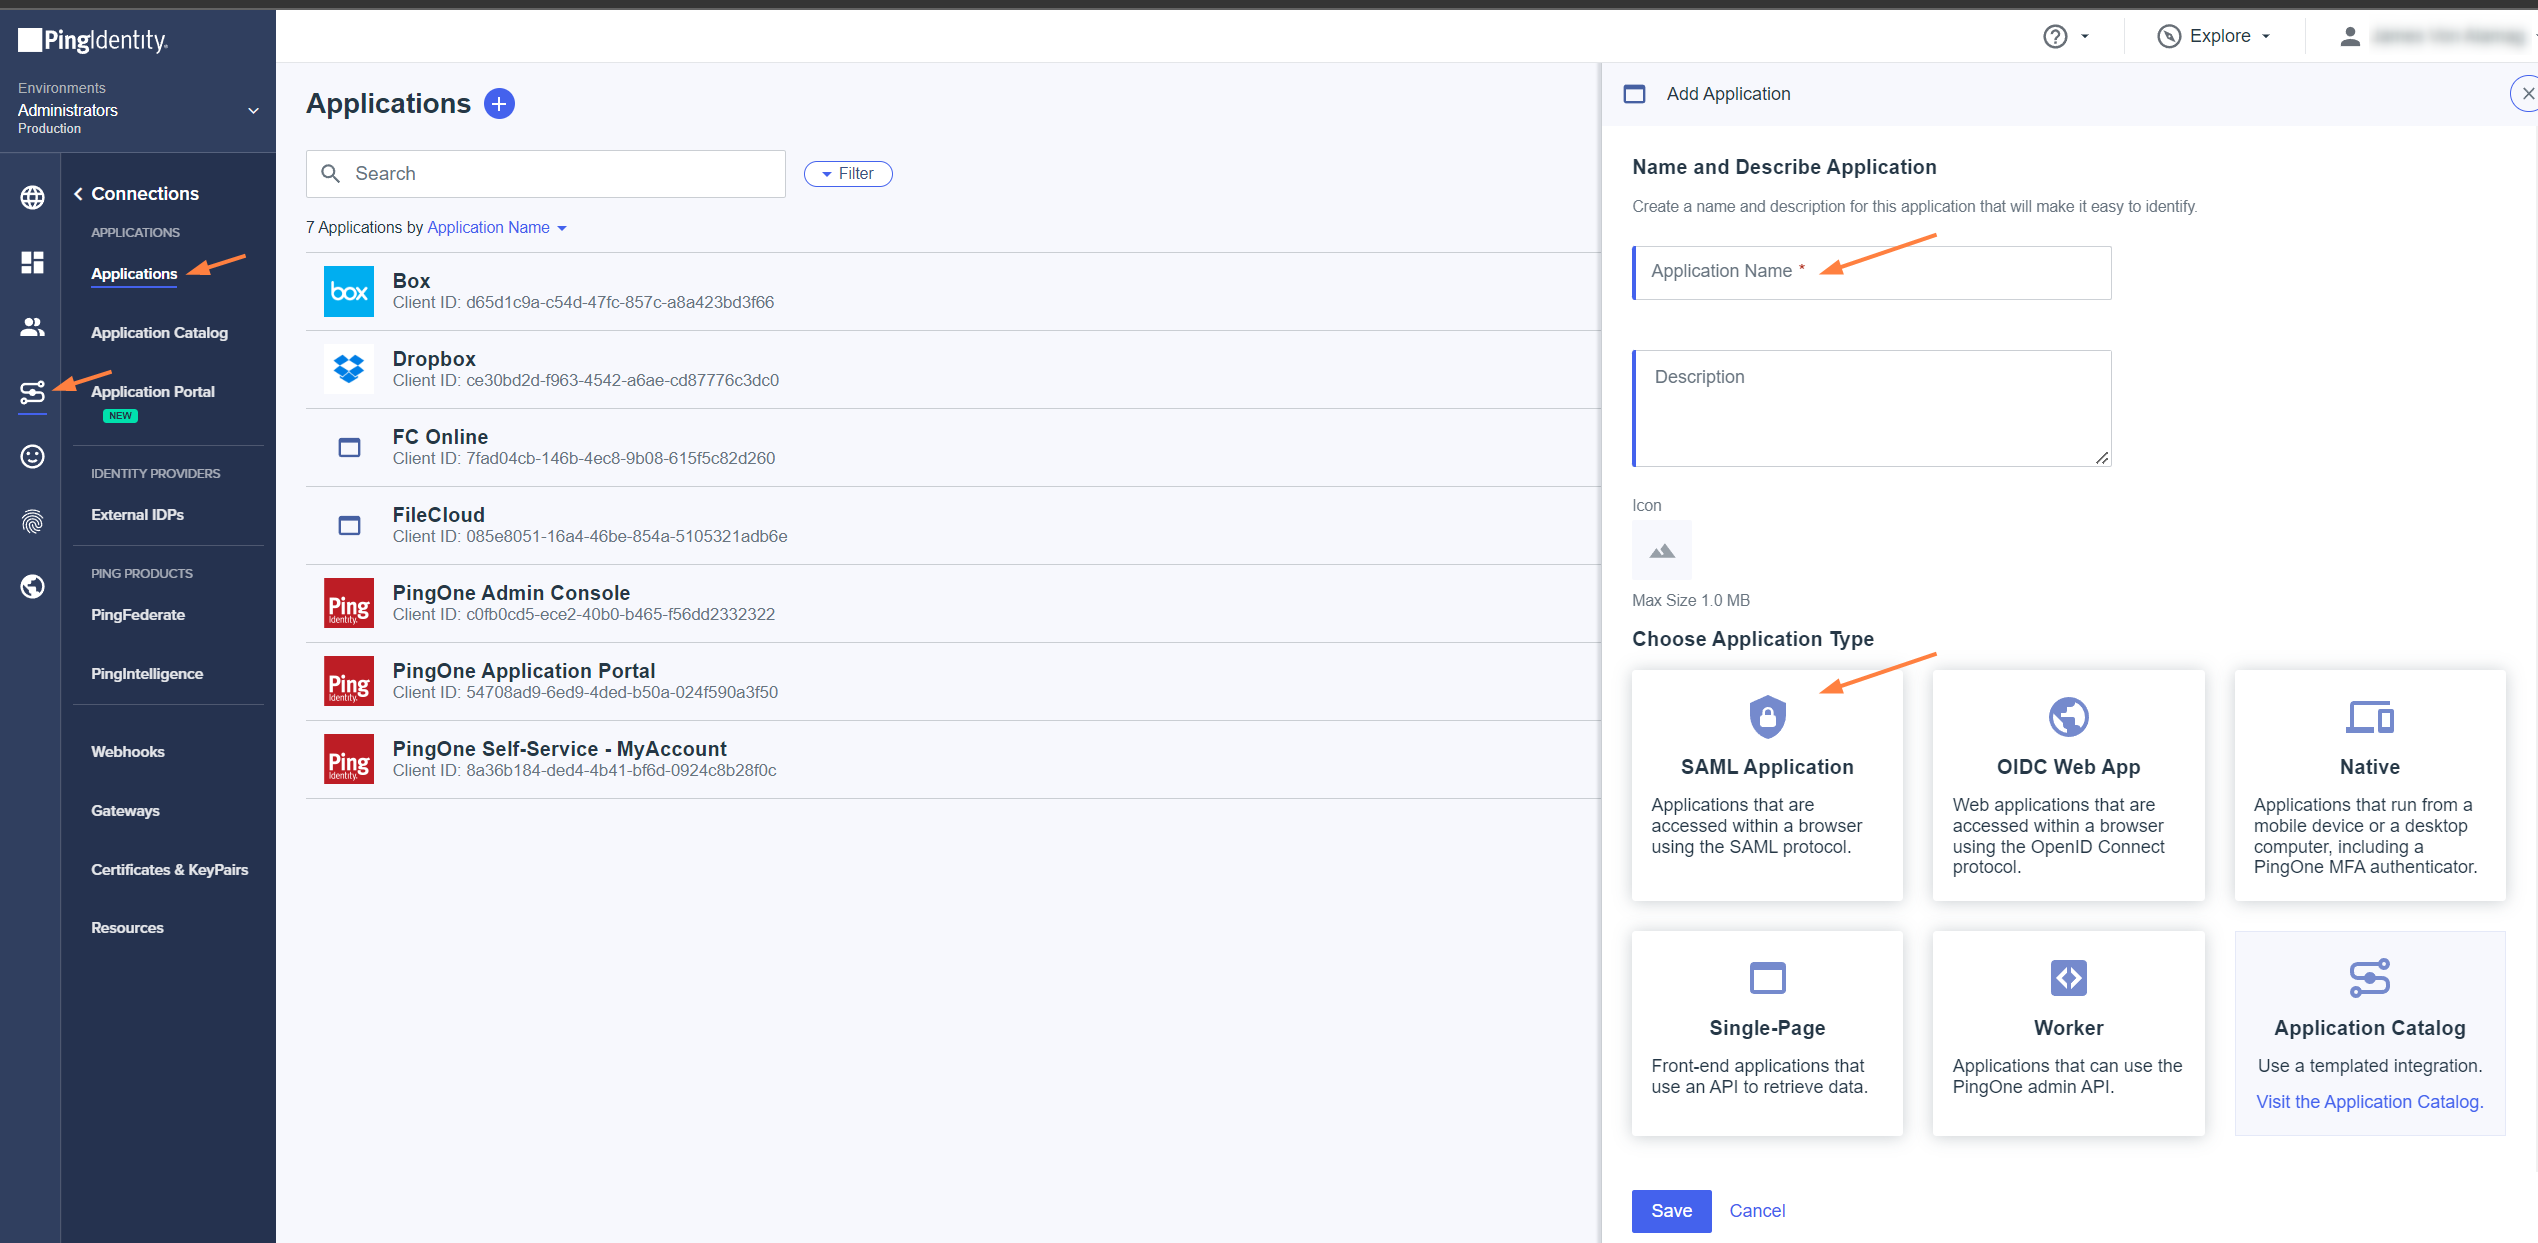
Log in to the Ping Identity dashboard, and click the Connections icon in the navigation panel.
-
Click Applications, then click the + button.
-
In the right panel, click SAML Application.
-
Name and save the application.
The SAML Configuration screen appears in the right panel. -
Select Manually Enter, and fill in the fields as follows:
ACS URLs:
https://<your_filecloud_url>/simplesaml/module.php/saml/sp/saml2-acs.php/default-sp
Entity ID:
https://<your_filecloud_url>/simplesaml/module.php/saml/sp/metadata.php/default-sp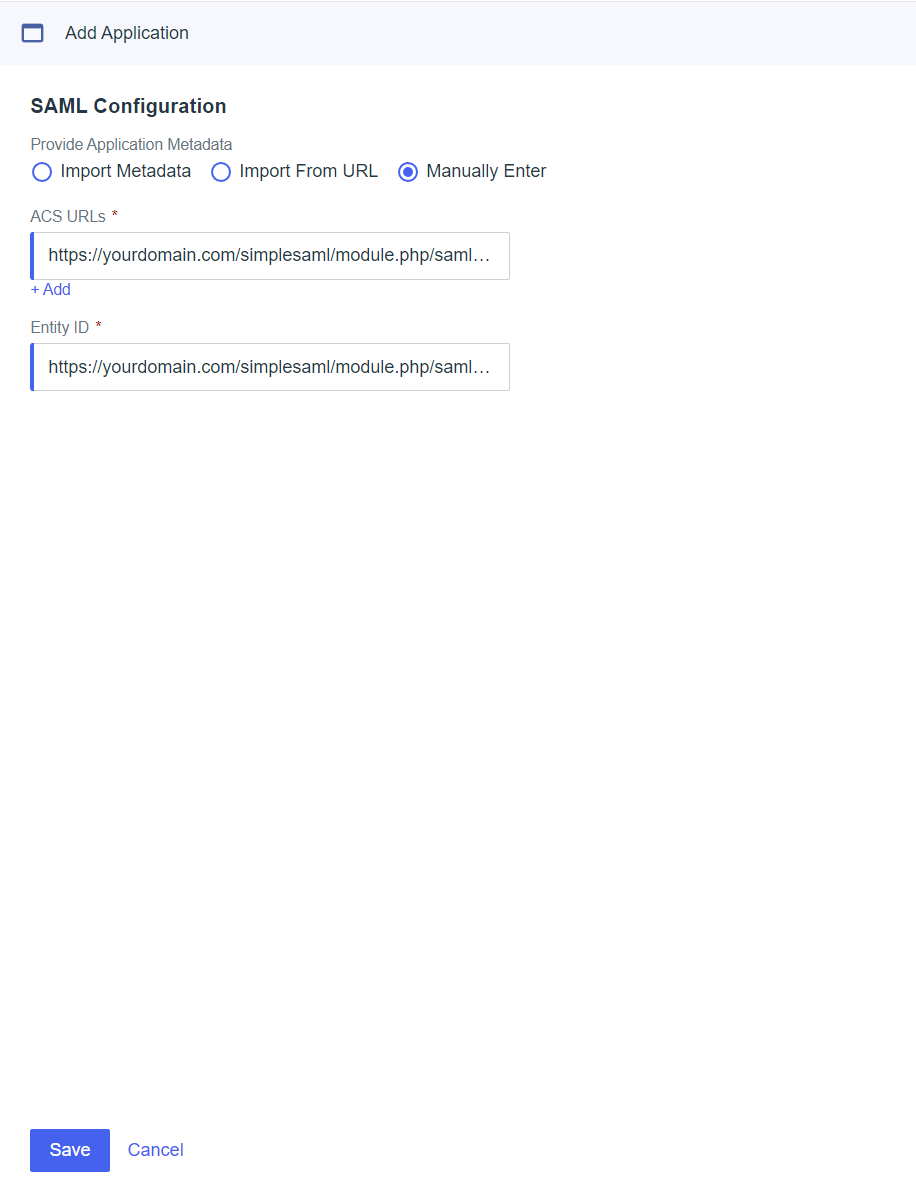
-
Click Save.
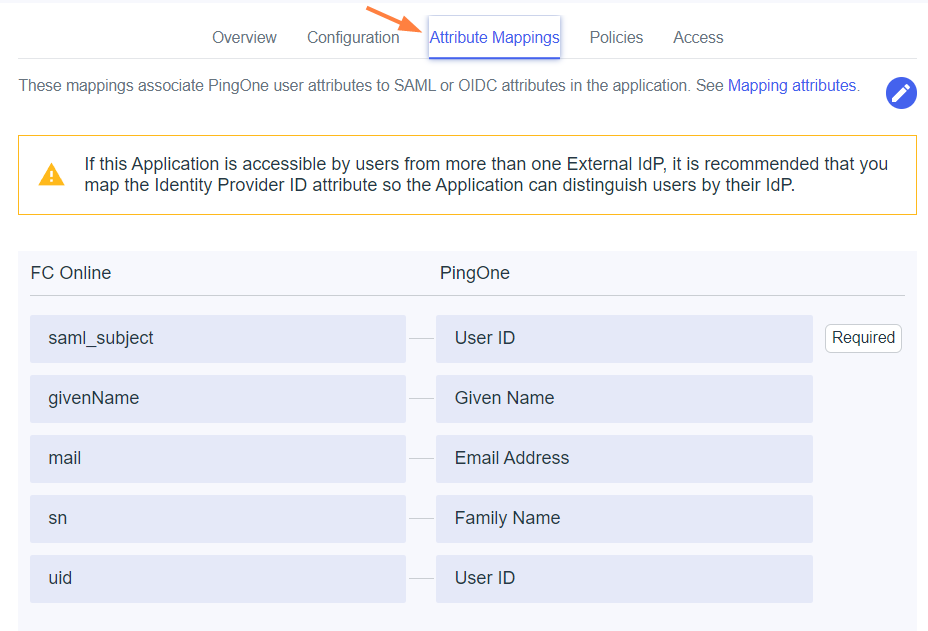
Several tabs appear in the right panel. -
Select the Attribute Mappings tab, then click

Field name
Flags
Ping One Value
givenName
Include in SAML Assertion
Given Name
mail
Include in SAML Assertion
Email Address
sn
Include in SAML Assertion
Family Name
uid
Include in SAML Assertion
User ID
-
Click the Configuration tab.
-
To get a copy of the metadata file associated with the configuration, click Download Metadata.
Save the file so you can enter its contents into the FileCloud admin portal.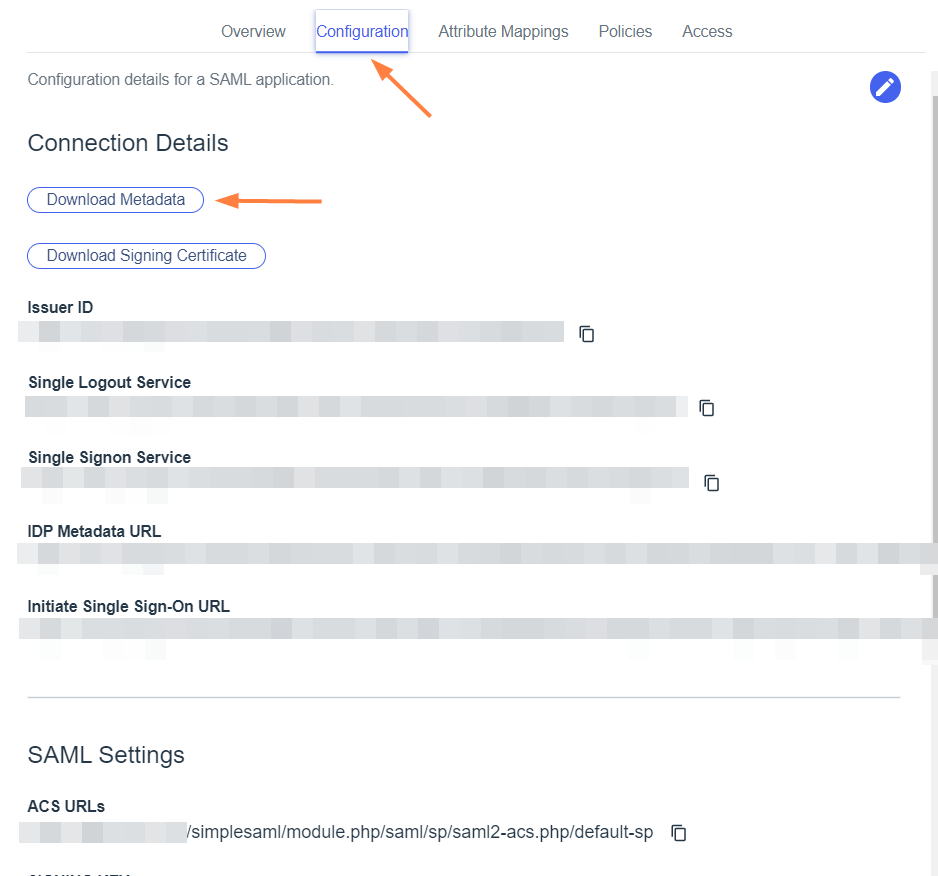
Your application configuration is now complete. -
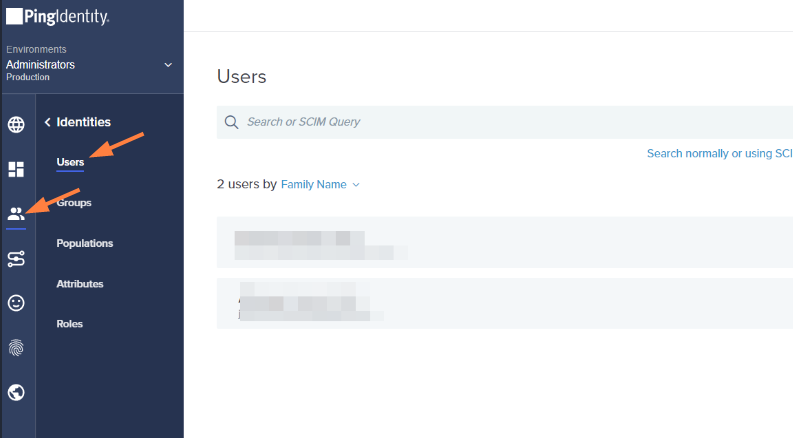
Click the Identities icon in the Ping Identity navigation panel.
-
Click Users, and then add your users.
Configuration in Filecloud Admin portal
-
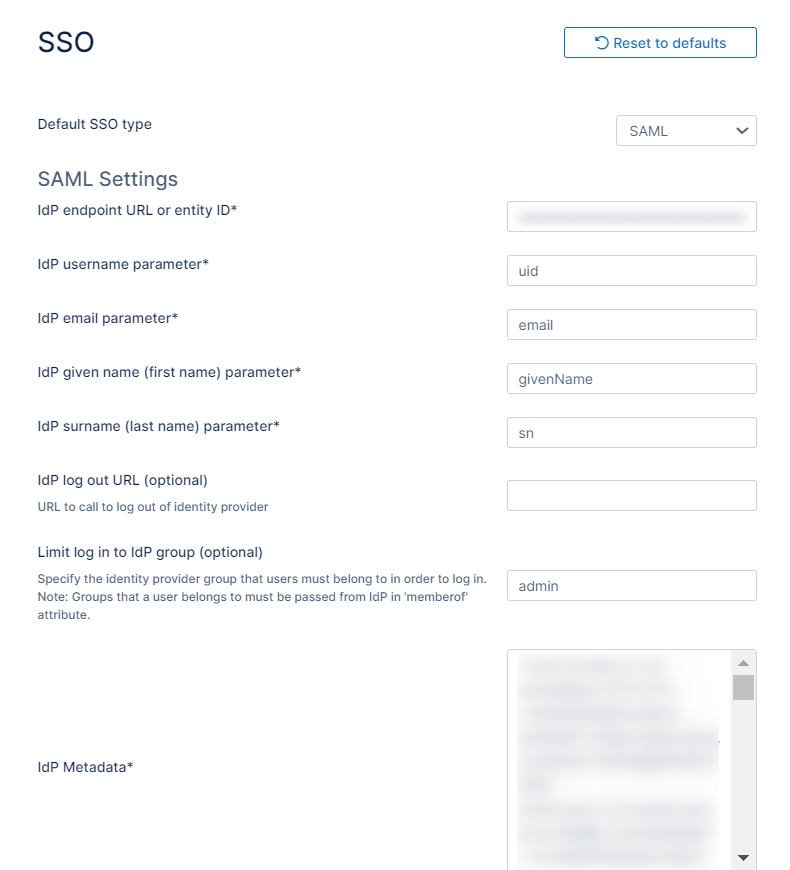
In the FileCloud admin portal's left navigation bar, scroll down and click Settings. Then, on the Settings navigation page, click SSO

The SSO page opens. -
Enter the following information:
Field
Value
IdP End Point URL
Enter the value of Issuer Id: ( Configuration tab → Issuer ID just below the "Download Metadata" button)
IdP Username Parameter
uid
IdP Email Parameter
mail
IdP Given Name Parameter
givenName
IdP Surname Parameter
sn
IdP Metadata
Copy the contents of the metadata file downloaded above paste them here.
-
If you want users to see the Ping Identity login after they click Login with SSO, scroll to the bottom of the screen and enable Show the Idp Login Screen.
If you want users to be directly logged into FileCloud after they click Login with SSO, do not enable Show the Idp Login Screen.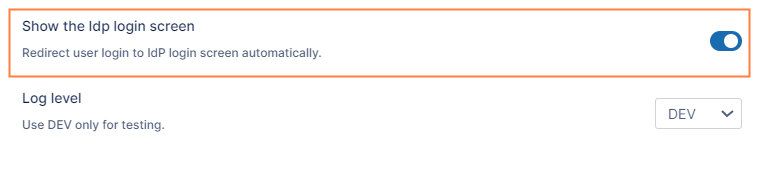
-
Fill in the other fields on the page as shown at SAML Single Sign-On Support.
-
Click Save.
-
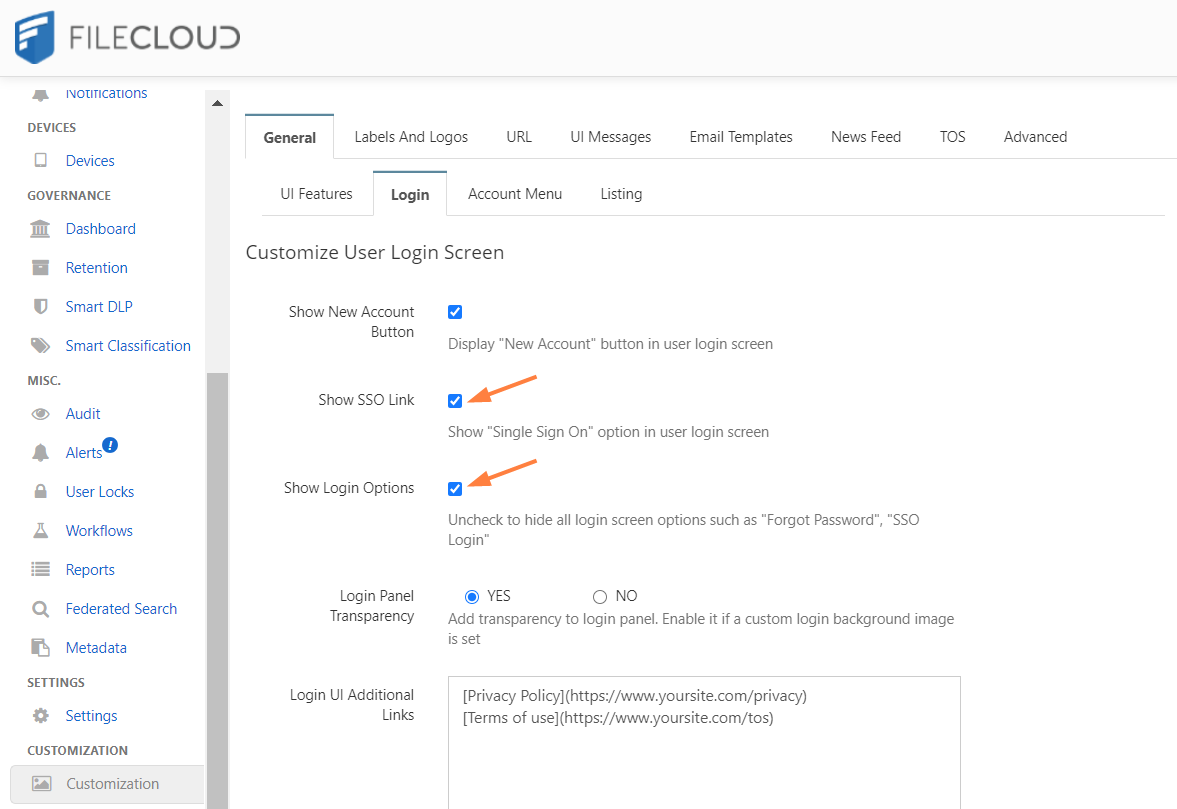
Go to Customization > General > Login and check Show SSO Link and Show Login Options.
Log in to FileCloud using Single Sign-on with Ping Identity
-
In the Filecloud User login page, the user chooses Login with SSO.
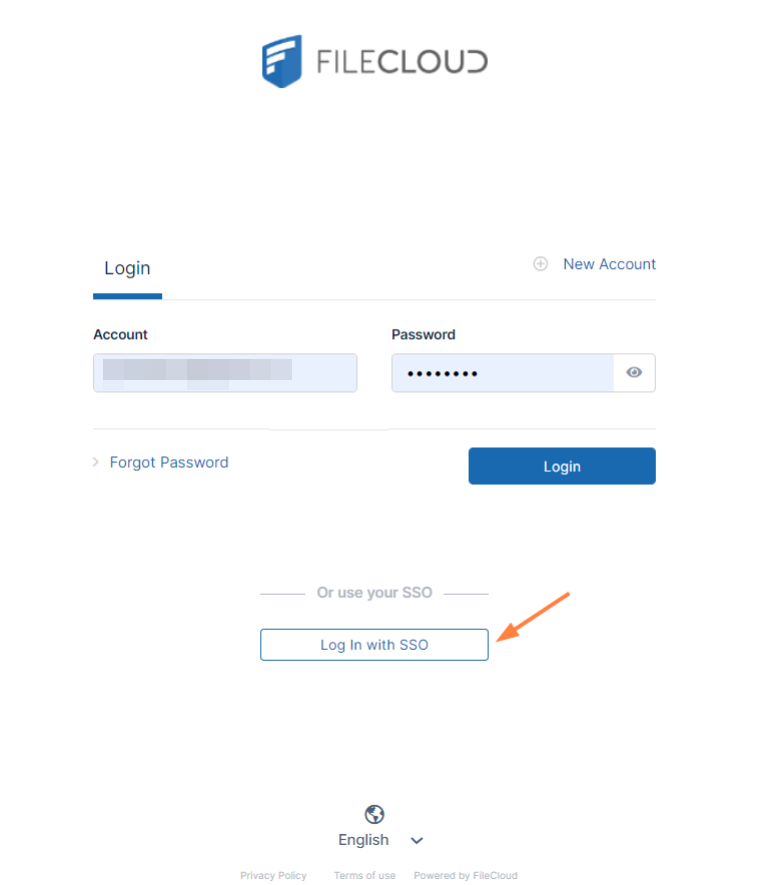
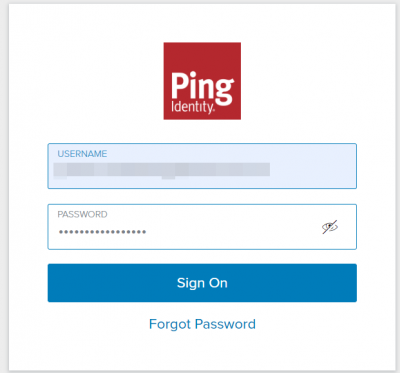
If you have checked Show the Idp Login Screen in the FileCloud SSO settings, the user is redirected to the Ping Identity login screen, and must click Sign On.
Otherwise, the user is directly logged in to FileCloud.