.svg)
The option of adding a signing order to the list of eSignature recipients is available in FileCloud 23.251 and later.
If eSignatures are enabled in your FileCloud system, you can choose a file or group of files to send for eSignatures. The signed documents are returned to your FileCloud account where you can continue to process them.
To request eSignatures on a single file:
-
Click the More [...] icon next to a file and choose eSignature.
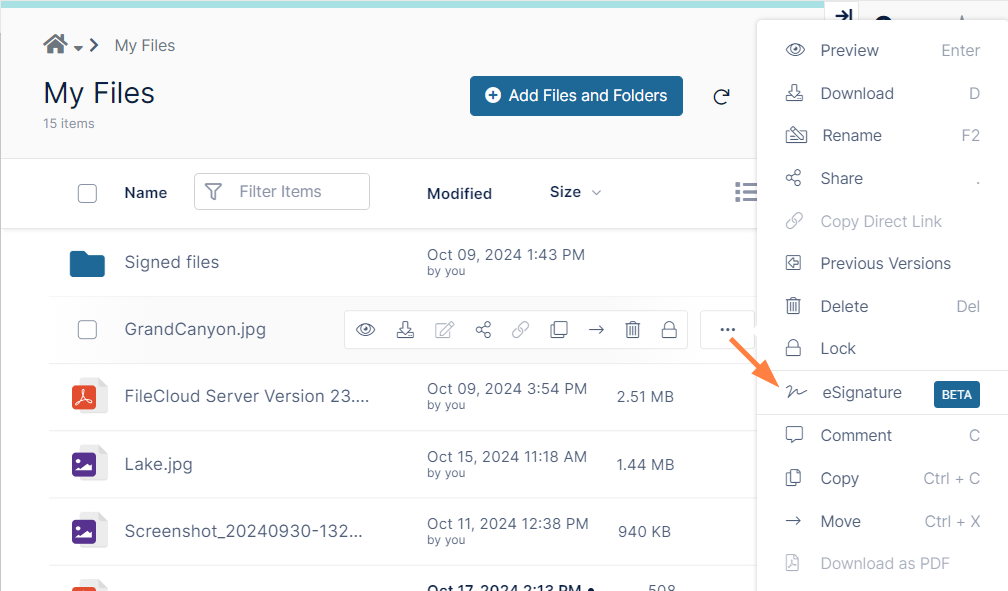
The eSignature dialog box opens in FileCloud. Here, you can modify the name of the eSignature document, change the location where the signed document will be stored in your FileCloud directory, and add recipients.
Note: The file you selected has been duplicated as a separate PDF eSignature document. The original document will remain unchanged. -
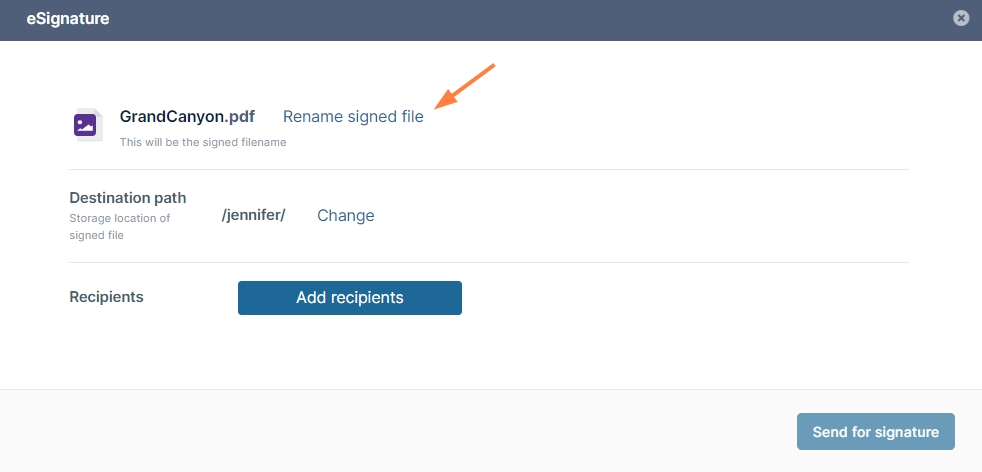
To change the name of the eSignature document, click Rename signed file.
-
Enter a new name and click Save.
The file is renamed.
Notes:-
The extension of every file sent for eSignature is changed to pdf if it is not already pdf.
-
The suffix _signed is added to the name of every file sent for eSignature, even when it is already renamed.
-
-
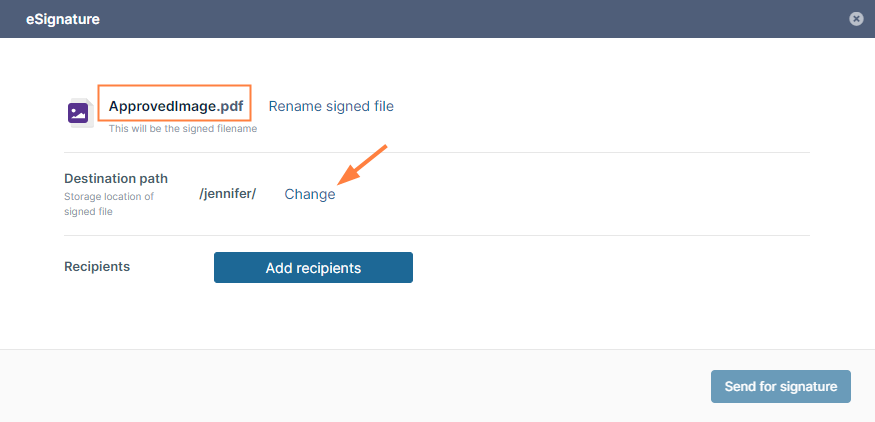
To change the storage path for the signed eSignature document, next to Destination path, click Change.
-
Navigate to the folder where you want to store the signed eSignature document and click Select.
The new destination path is saved. -
To add recipients to the signature request, click Add recipients.
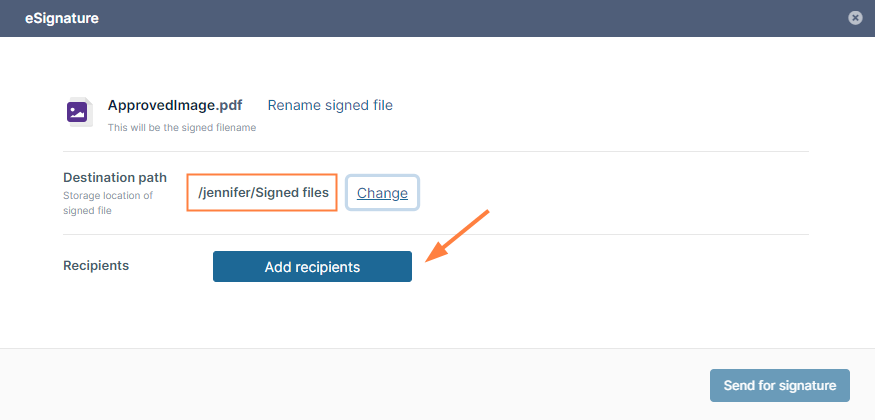
The Invite users to sign this document dialog box opens. -
Enter a recipient's email address and name.
You can add any number of recipients. -
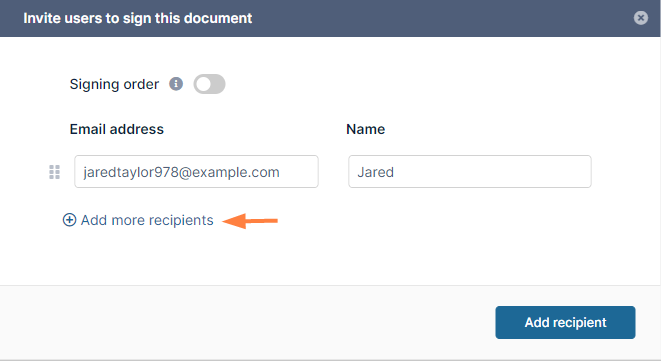
To add more recipients, click + Add more recipients.
You have the option of adding a signing order to the list of recipients. The signing order indicates in which order the recipients are sent the document for signing. Initially, the document is sent to the recipient or recipients marked [1] in the signing order. When all the recipients marked [1] sign the document, it is sent to the recipient or recipients marked [2]. When all the recipients marked [2] sign the document, it is sent to the recipient or recipients marked [3], and so on. -
To add a signing order to the recipients, enable Signing order.
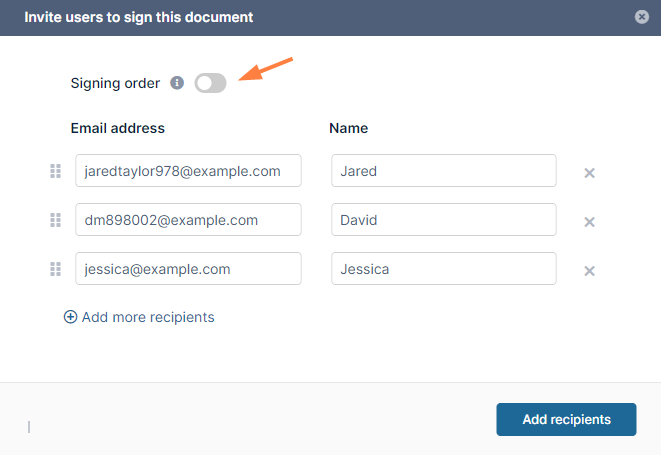
When you initially enable Signing order, recipients are assigned numbers in the order in which they appear: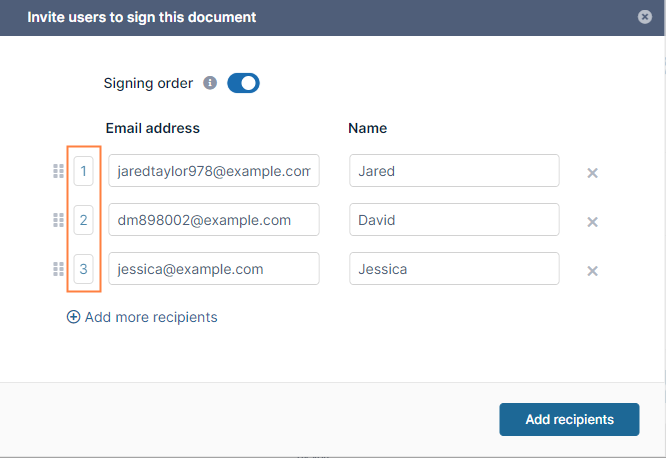
-
To change the signing order:
-
click and hold the drag handles for a user and move it to a new position in the signing order:
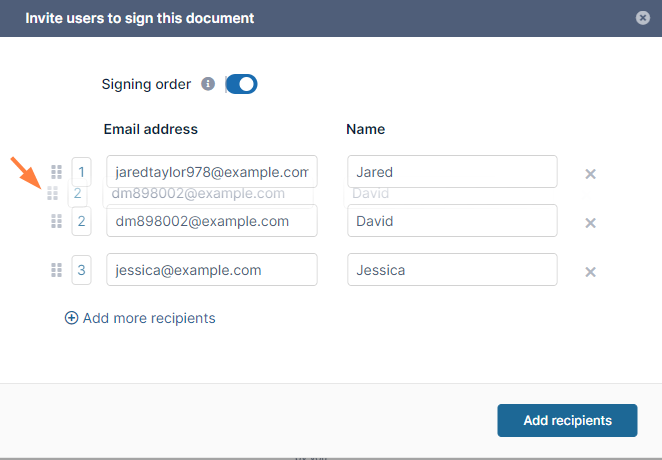
OR -
double-click on a number and enter a new one. The recipients are automatically rearranged in the correct order.
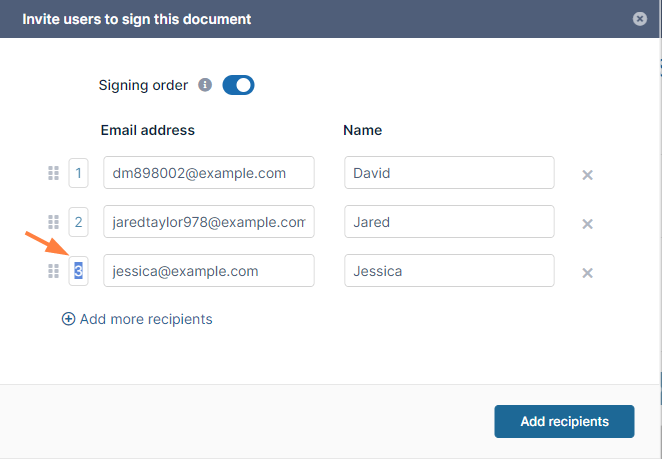
If you give multiple recipients the same number in the signing order, they receive the document at the same time, and all must sign it before it moves to the next recipient or is marked complete.
In the following screenshot, after David and Jared sign the document, it is sent to Jessica.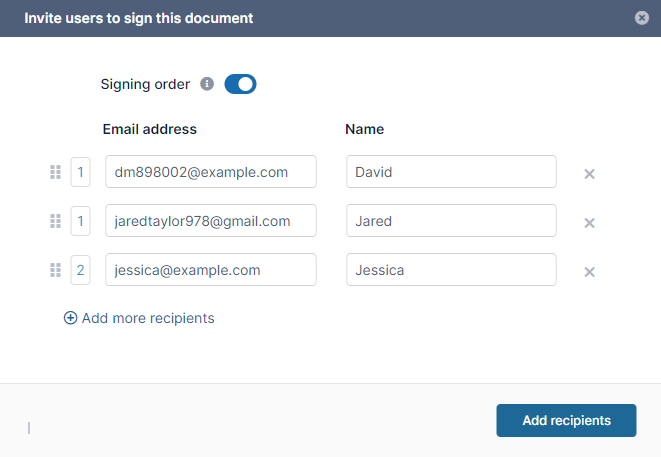
If you begin using the grab bars to change the order of the recipients before you manually enable Signing order, FileCloud automatically enables it for you.
When you have finished adding recipients, click Add recipient(s).
At this point, you will have a slightly different experience depending on the eSignature application your system is configured with.
If the next screen you see resembles the following and does not show an image of the file below the recipients: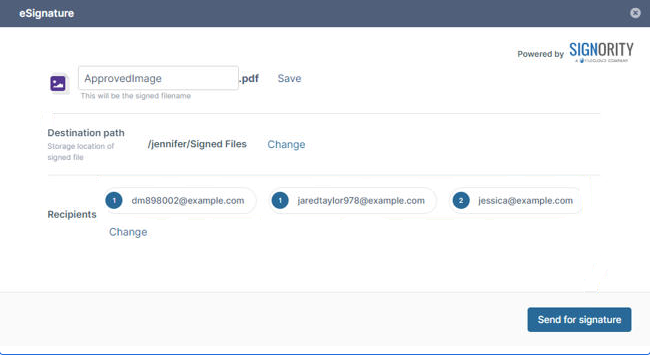
your system is configured with the Signority eSignature application, and you should complete these steps:
-
Click to expand...
The recipient or recipients are listed in the eSignature dialog box.
-
Click Send for signature.
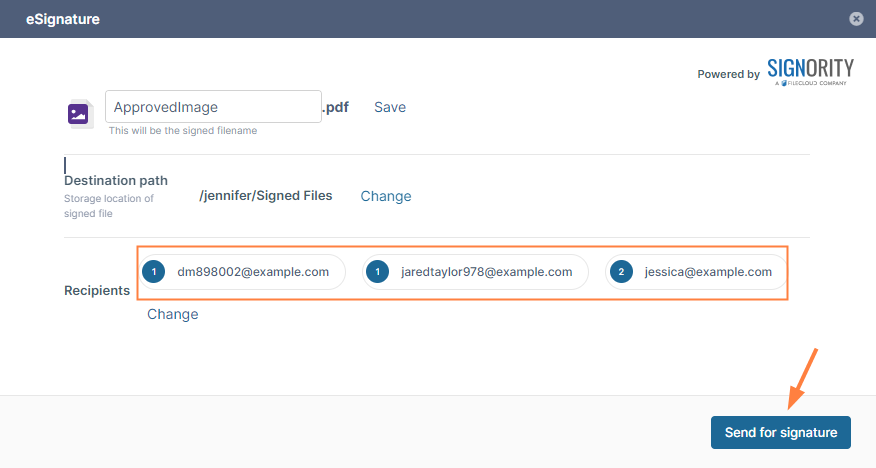
The following prompt opens: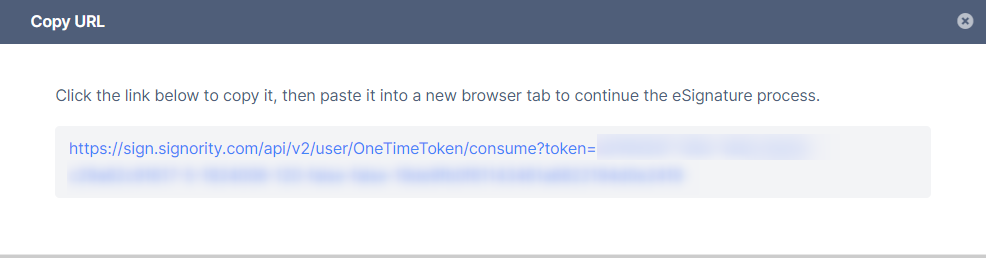
-
Click the link to copy it.
-
Paste the link into a new browser tab, and click [Enter].
The Signority platform opens and displays the file as it will appear to the recipients.
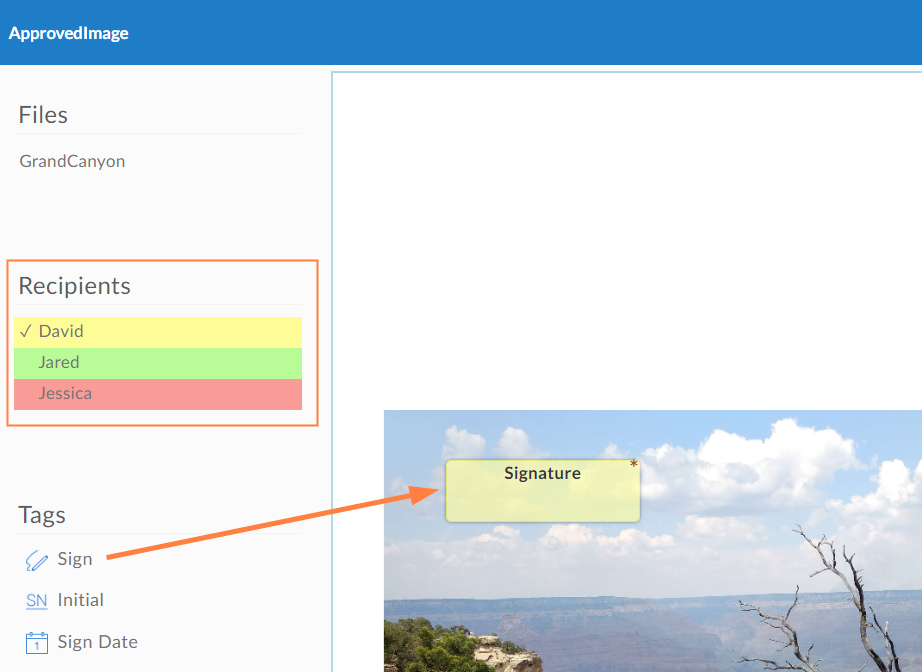
The following instructions walk you briefly through the process of getting your eSignature document ready for signatures and sending it to recipients in Signority. For more complete instructions on using Signority, see https://www.signority.com/help/ .The recipients are listed in the left panel. The first one is checked, indicating that tags you add apply to that recipient.
-
Drag and drop tags onto the document for the recipient to fill in (such as a Sign tag).
-
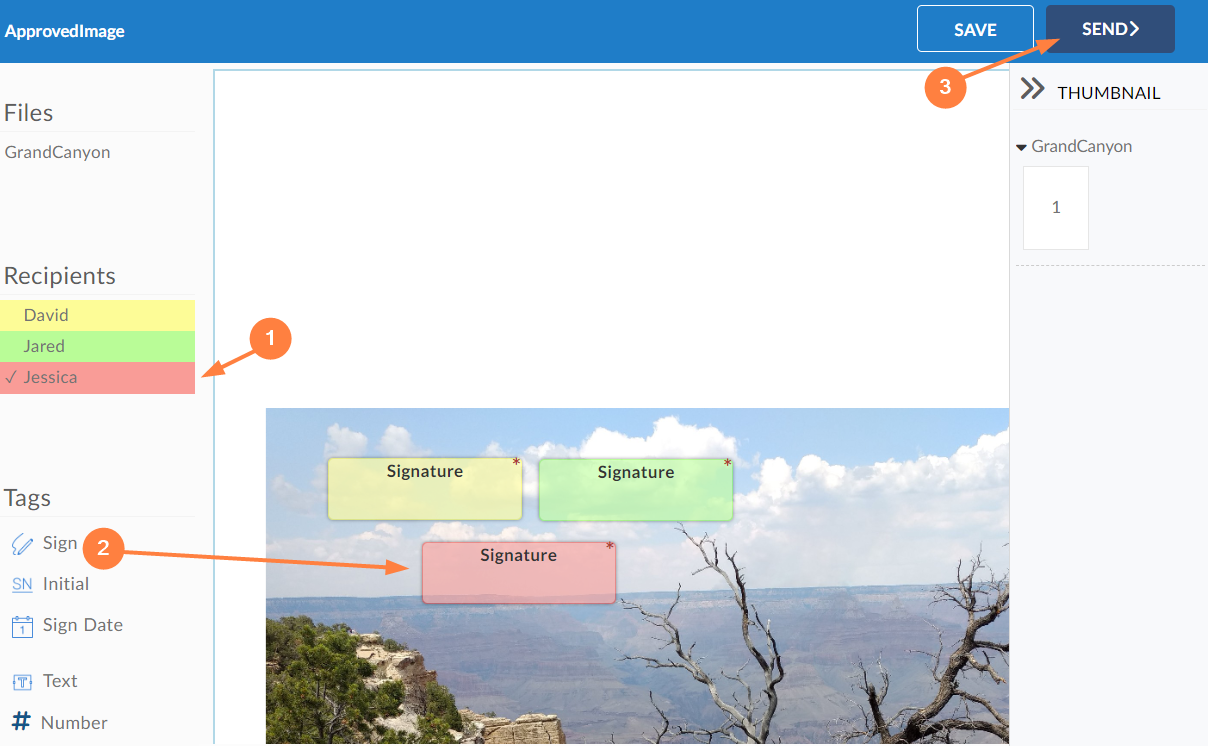
If there are multiple recipients, check the other recipients and drag tags onto the document for them to fill in.
-
To send the file to the recipients for signing, click Send.
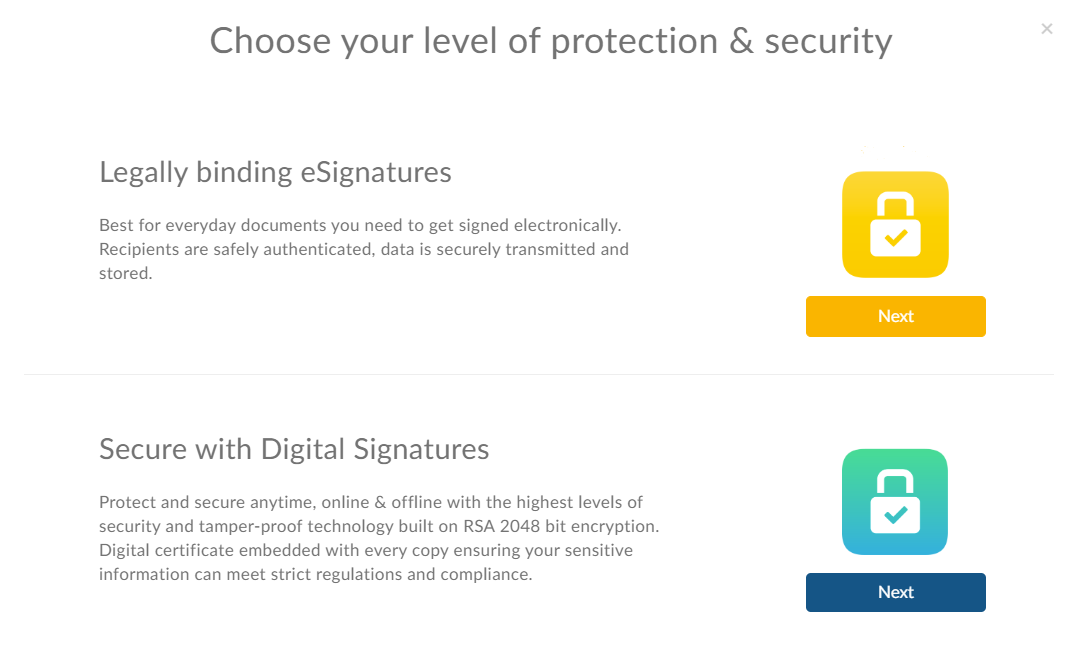
You are given the option of choosing eSignature or Digital Signature.
-
Below eSignature or Digital Signature click Next.
Note: The Secure with Digital Signatures option only appears if your plan includes digital signatures.
The file is sent to the recipients:
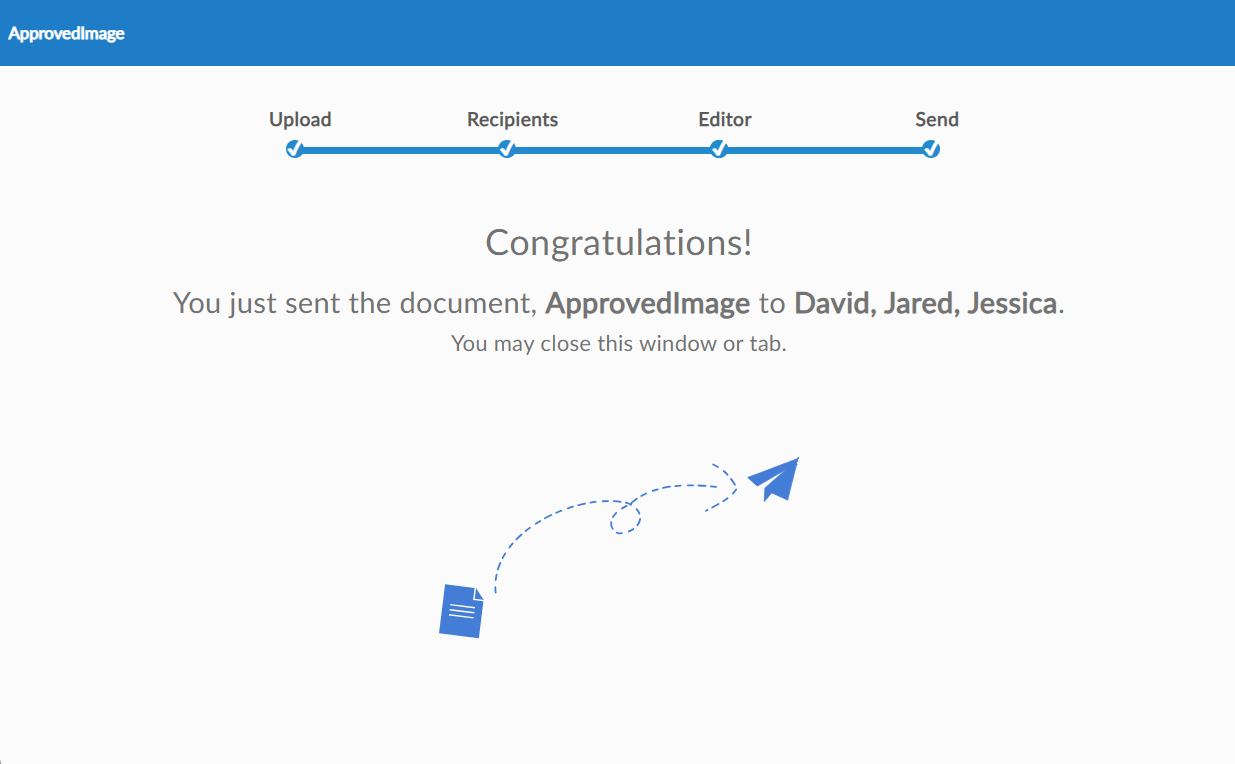
-
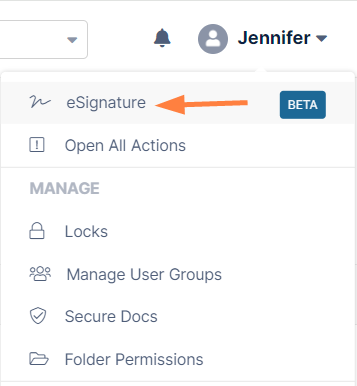
You may close Signority. In FileCloud, to go to the eSignature screen in the user drop-down list, click eSignature.
The eSignature document appears in the In Progress tab of the eSignature screen.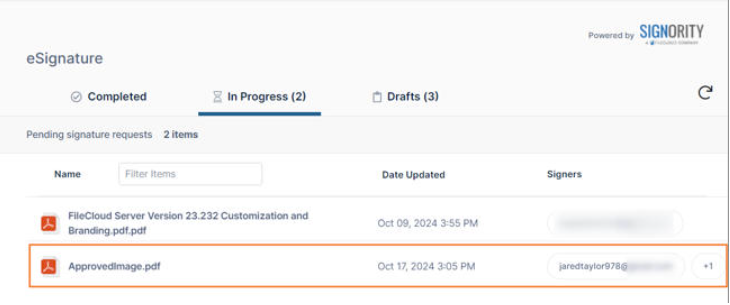
If the next screen you see resembles the following and shows a document preview below the recipients:
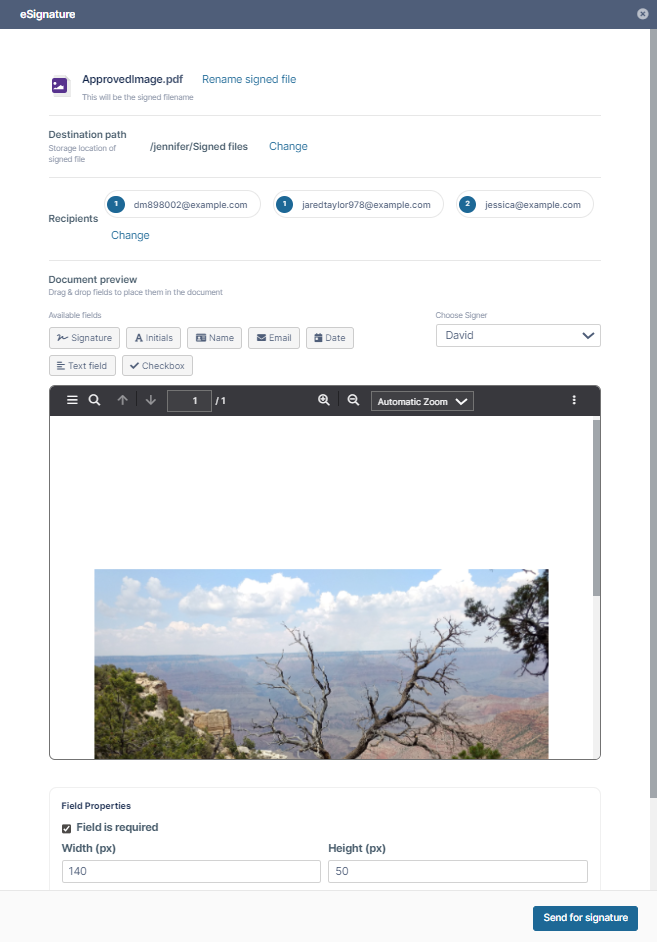
your system is configured with the Signit eSignature application, and you should complete these steps:
Click to expand...
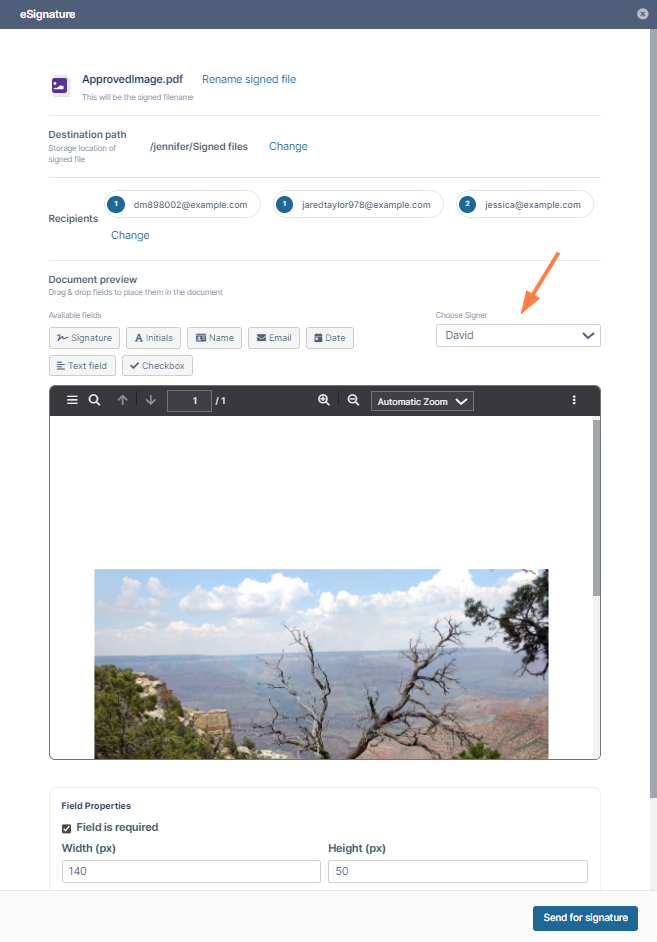
The eSignature dialog box displays the file as it will appear to the recipients.
The following instructions walk you briefly through the process of getting your eSignature document ready for signatures and sending it to recipients. For more complete instructions on using Signit, see https://help.signit.sa/en/getting-started .
-
The recipients are listed above the document preview panel. The first one is selected in the Choose Signer drop-down list, indicating that tags you add to the document apply to that recipient.
-
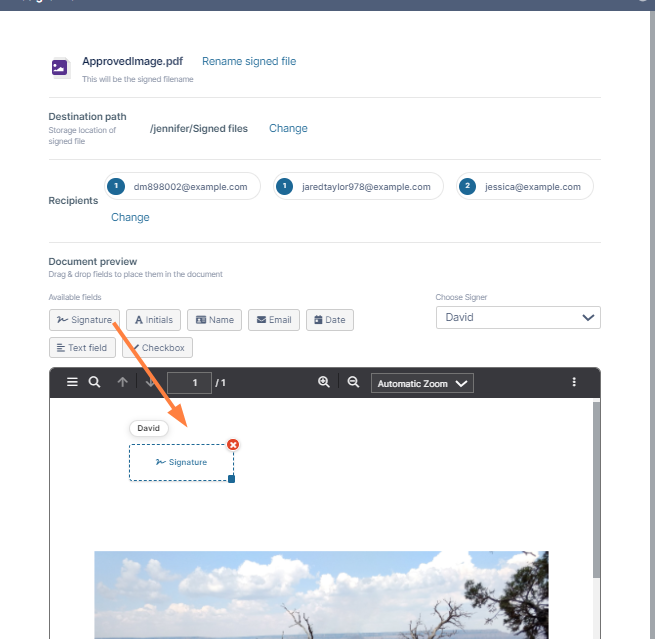
Drag and drop tags onto the document for the recipient to fill in (such as a Signature tag).
-
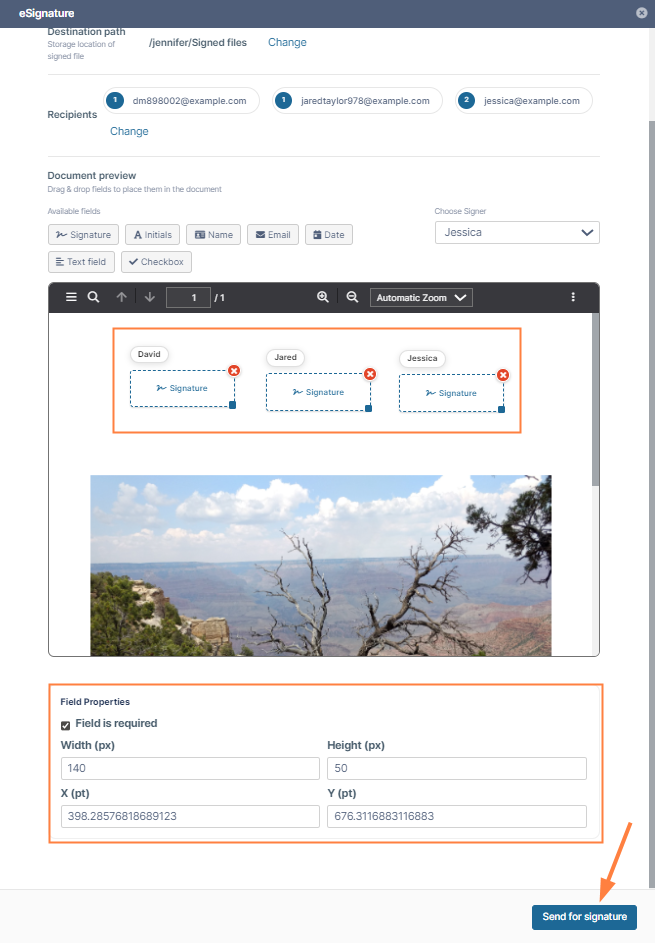
If there are multiple recipients, choose the other recipients in the drop-down list, and drag tags onto the document for them to fill in.
-
You may change the values under Field Properties to change the size and position of the fields.
-
To send the file to the recipients for signing, click Send for signature.
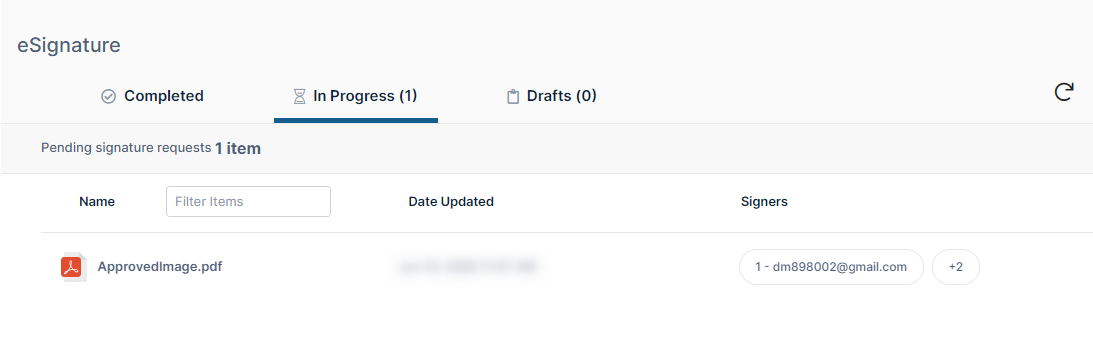
You are taken to the In Progress tab of the eSignature screen, where the eSignature document is listed.
Each recipient receives an email with a link for reviewing the document.
You will receive an email notification each time a recipient signs the document as well as a final notification telling you that
all required signatures have been added.
Each recipient also receives an email informing them that signing of the document has been finalized. Depending on your system configuration, the email may contain links or attachments of signed documents and may contain audit trail files.
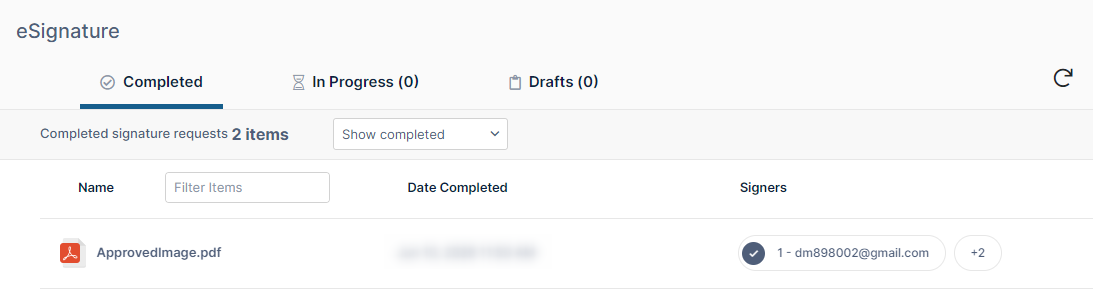
In your FileCloud eSignature screen, the document now appears in the Completed tab:
It also appears in the destination folder that you specified when setting up the request:
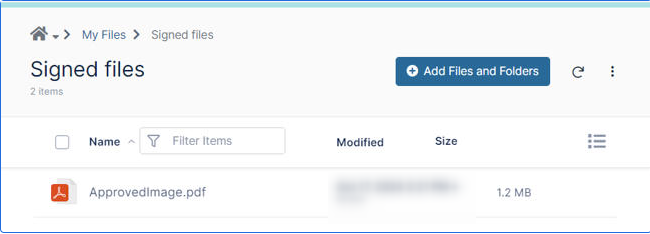
By default, only the signed pdf is sent to you in the Completed tab and the destination folder, but your admin may customize the setup to return an audit trail as well, either attached to the signed pdf or in a separate attachment.
To request eSignatures on a group of files:
You can send a group of files for eSignatures in a single request.
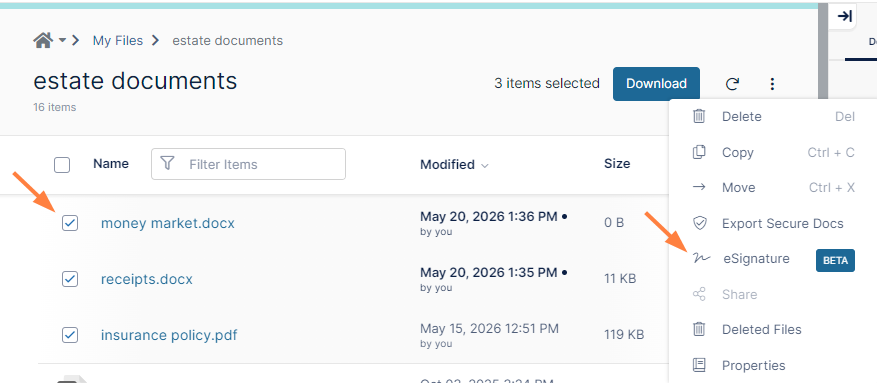
Check the files that you want to send for signatures, and click the More icon in the upper-right corner of the screen and choose eSignature.
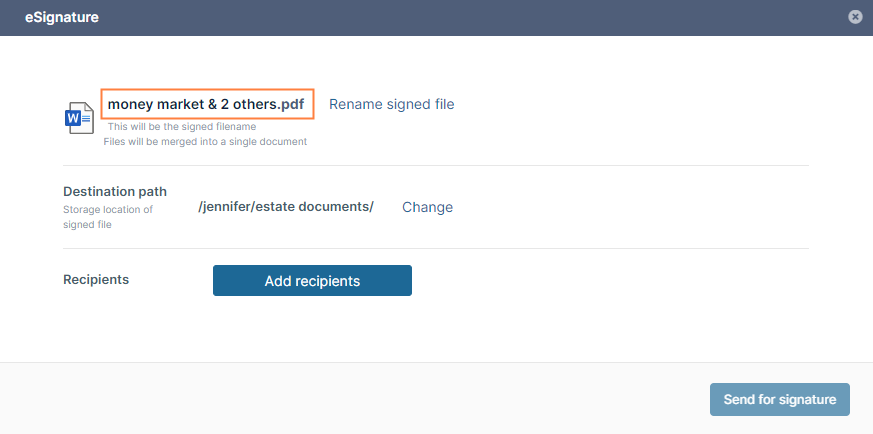
The eSignature dialog box opens.
Notice that the files that you checked have been merged into a single PDF eSignature document. The original files remain separate and unchanged.
At this point you are managing one eSignature document. Use steps in the procedure above for a single file to complete the eSignature process.