.svg)
Pre-upgrade:
Please read the appropriate upgrade notes for the version you are upgrading from before proceeding with the following steps.
STEP 1: Backup existing installation
|
FileCloud installation environment |
Backup steps |
|
Windows OS and installation without backup tool |
STEP 2: Preparing for update
-
Download the latest FileCloud Windows Update Tool from https://patch.codelathe.com/tonidocloud/live/installer/cloudupdatetool.zip
Note: It is essential that you download the latest version of the update tool; If you run an old version of the tool, you will re-install an old version of FileCloud. -
Extract all files from cloudupdatetool.zip into a folder.
-
If your system allows downloading of files from internet, go to step 5. Otherwise, complete step 4 first.
-
Download the following files and copy them to the extracted folder (the cloudupdatetool folder)
-
FileCloud Windows Preupgrade Package from https://patch.codelathe.com/tonidocloud/live/installer/filecloudpreupgrade.zip
-
FileCloud Windows Preupgrade XML - Right-click and save the file https://patch.codelathe.com/tonidocloud/live/installer/filecloudpreupgrade.xml
-
FileCloud Windows Update Package from https://patch.codelathe.com/tonidocloud/live/installer/filecloudupdate.zip
-
FileCloud Windows Update XML - Right-click and save the file https://patch.codelathe.com/tonidocloud/live/installer/filecloudupdate.xml
-
-
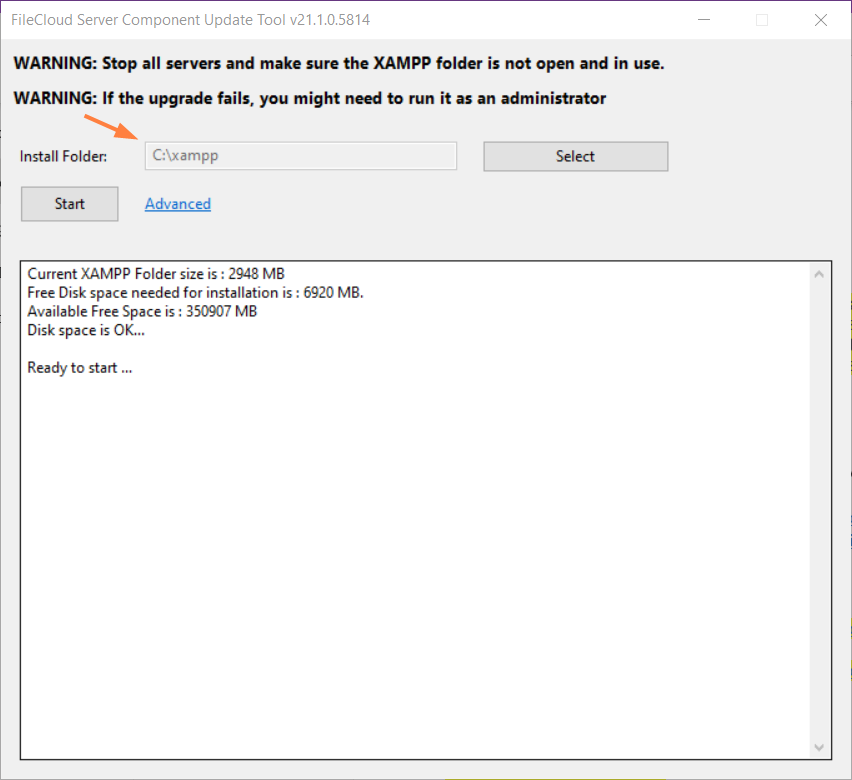
Now, navigate to the cloudupdatetool folder and double click on

(cloudupdate.exe). The following window opens:
STEP 3: Update
-
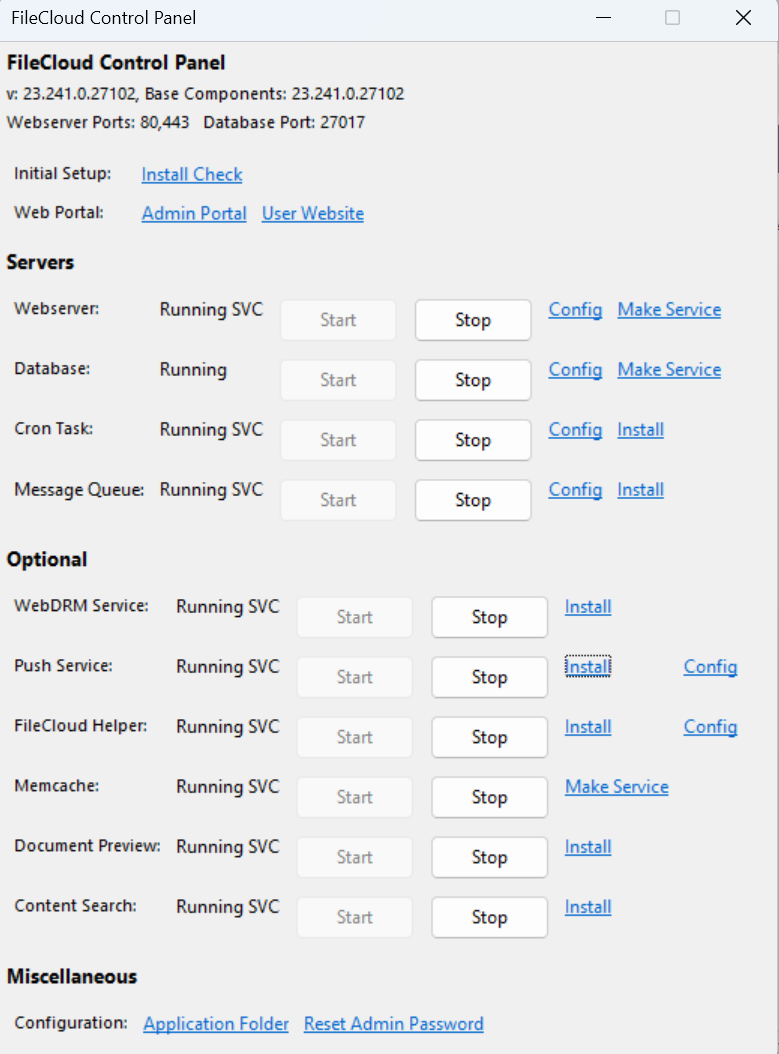
Open the FileCloud Control Panel and confirm that each service you are using is running, and that your storage is in the READY state.
-
Ensure that Install Folder shows the location of your XAMPP folder. This location is auto-detected, but it may not be able to determine it correctly if there are multiple XAMPP folders. If it is not correct, select the correct XAMPP install folder.
-
Click Start on the Update Tool dialog box to begin the upgrade. (Repeat steps 1-3 for each of the nodes for HA system).
The tool must be able to connect to the internet in order to download the update package. Please contact support@codelathe.com if you see any errors in this step.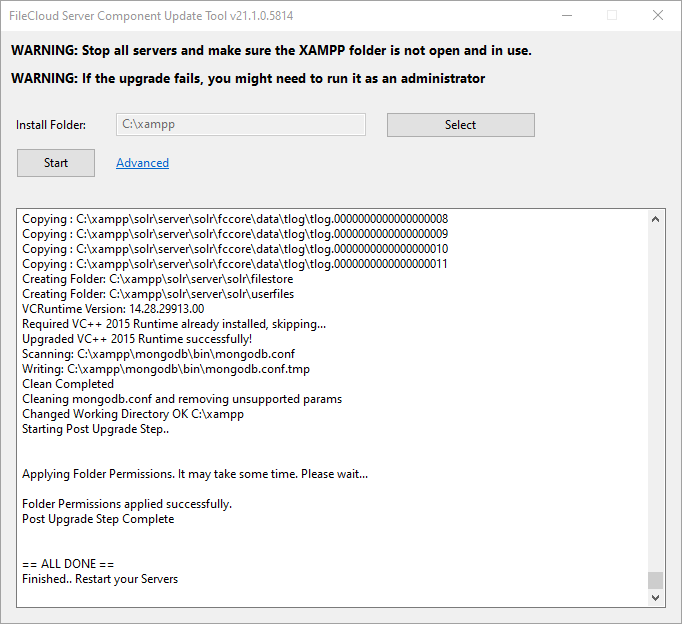
If you receive an error message, see Troubleshooting the Upgrade Tool. -
If you are running multi-tenant FileCloud, make sure the database post upgrade script is run correctly.
cd c:\xampp\htdocs\resources\backupc:\xampp\php\php.exe fcpostupgrade.php -
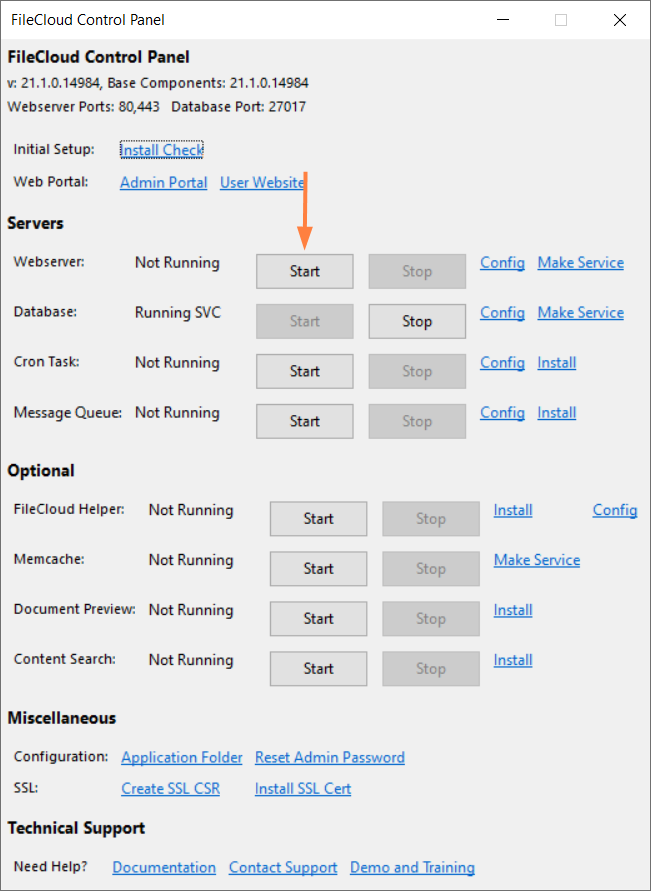
Once the nodes are updated, start each of the nodes using the cloud control panel.
-
Message Queue is an important service and must be started after the upgrade.
Message Queue must be installed. If you cannot click the Start button for Message Queue, it is not installed. Click Install, and once installation is complete, click Start.
-
Open the install URL http://<your domain>/install/index.php
-
Make sure basic checks are all OK.
-
Click on Extended Checks.
In section 3 of Extended Checks, your new updates are shown with status and available actions. -
If Apache is running as the Windows Logon account, then give the logon account write permission on the XAMPP folder.
-
When you initially log in to the admin portal after upgrade, refresh the browser using CTRL-F5 to clear any prior setup information from the cache.
-
Beginning in FileCloud 20.1, to sign into the admin portal for multi-tenancy, you must sign in as the superadmin user and enter your password in encrypted format in the multi.php file. See Password encryption and logging in to a multi-tenant admin portal for instructions on encrypting your password.
Custom settings in configuration files that are replaced during upgrade are not reset in the new configuration files.
Check If the following files are replaced with newer versions during upgrade, and in the case that they are replaced, reconfigure any custom settings after upgrade:
C:\xampp\apache\conf\httpd.conf
C:\xampp\apache\conf\extra\httpd-filecloud.conf
C:\xampp\apache\conf\extra\httpd-ssl.conf
C:\xampp\cron.ini
C:\xampp\htdocs\.htaccess
C:\xampp\php\php.ini
C:\xampp\htdocs\src\Scripts\config\default.json