.svg)
Integration of FileCloud with Signit’s eSignature solution is available in FileCloud versions 23.262 and higher.
Integration of FileCloud with Signority's eSignature platform is available in FileCloud versions 23.241.4 and higher.
Some users' plans may not include the digital signature option discussed here.
FileCloud can be configured to integrate with Signority or Signit to enable your users to submit files for eSignatures:
How the eSignature process works
In the admin portal, you configure Signority or Signit as an eSignature platform.
In FileCloud, the user selects one or more files to be signed. FileCloud creates a new PDF containing the file or files and prompts the user for a PDF name, a signed document location in FileCloud, and document signers. (The original files remain as they are, and can be used to create other signature documents.)
After recipients are added:
-
In Signority, the user enters the Signority site and is prompted to add signature fields to the document.
The user is then given the option of sending a document for eSignature or digital signature.
Once a send option is chosen, Signority sends the signing requests to each recipient. -
In Signit, a Signit screen for adding signature fields to the document opens in FileCloud. After adding signature fields, the user directs Signit to send the signing requests to each recipient.
The user can now follow the signature document's status in FileCloud as the recipients sign it, and it moves from In Progress to Completed. The user receives emails when each recipient finishes signing the document and when all recipients have finished signing.
See eSignature Requests for a step by step description of the above process.
Once the document is signed, the user can access the signed PDF in the FileCloud location specified for storing the signed document.
Incomplete eSignature documents are stored in the eSignature application (Signority or Signit) as well as FileCloud. In Signority, when a signing request is completed, deleted, or expired, the eSignature document is removed from the eSignature application.
The signer's experience
Prerequisites for FileCloud eSignature integration
-
You must have either:
-
a trial or paid Signority account, obtained either prior to setting up integration or obtained through FileCloud's admin portal eSignature screen.
-
a paid Signit account, obtained prior to setting up integrations.
-
-
eSignature must be enabled in a user's policy for the user to be able to use the eSignature feature. By default, the feature is enabled in all policies.
-
Document Converter must be installed and running in FileCloud.
File types supported for eSignature
The file types currently supported in FileCloud for eSignature are:
-
PDF
-
DOCX
-
PPTX
-
PNG
-
JPG/JPEG
File types that are not supported for eSignature do not show the eSignature option in the More [...] drop-down list.
Limitations
-
The combined size of all files in a single signing request may not exceed 50 MB.
-
Translations of the user interface are available in Arabic, French, Portuguese, and Spanish.
However:-
Messages from the server, which appear when users view a request in the eSignature screen, are not translated.
-
The admin portal does not support these translations.
-
-
Audit details are omitted by default, but can be returned combined with an eSignature document or as a separate file. See To return audit details, below, for information on returning audit details.
-
DLP rules that block files from being shared do not block them from being sent for eSignatures.
To enable/disable eSignatures for certain users:
By default, the eSignature feature is enabled in users' policies.
-
In the FileCloud admin portal's left navigation bar, scroll down and click Settings. Then, on the Settings navigation page, click Policies

The Policies page opens. -
Edit the users' policy.
-
Click the User Policy tab.
Scroll down until you see the eSignature field. -
Enable or disable eSignature.

For information about the eSignature process for users, see eSignature Requests.
To return audit details
When the files are accessed in FileCloud:
By default, when the eSignature document is returned to the destination path specified by the user or the Completed panel in the eSignature page in FileCloud, the document is returned without audit details. However, you may configure the process to either return a separate audit file or audit details attached to the eSignature document in the destination folder,
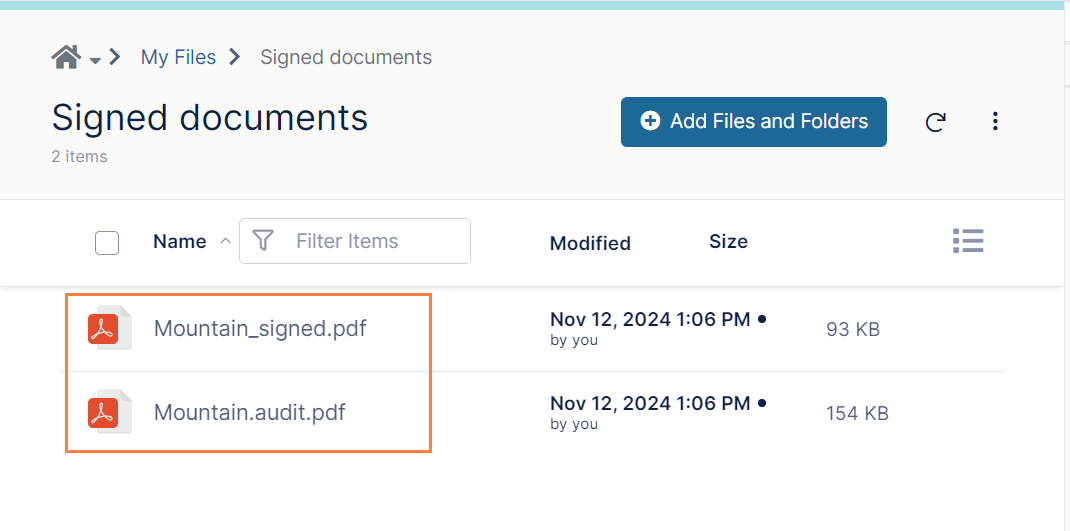
When separate signed and audit files are configured, they appear in the destination folder as:
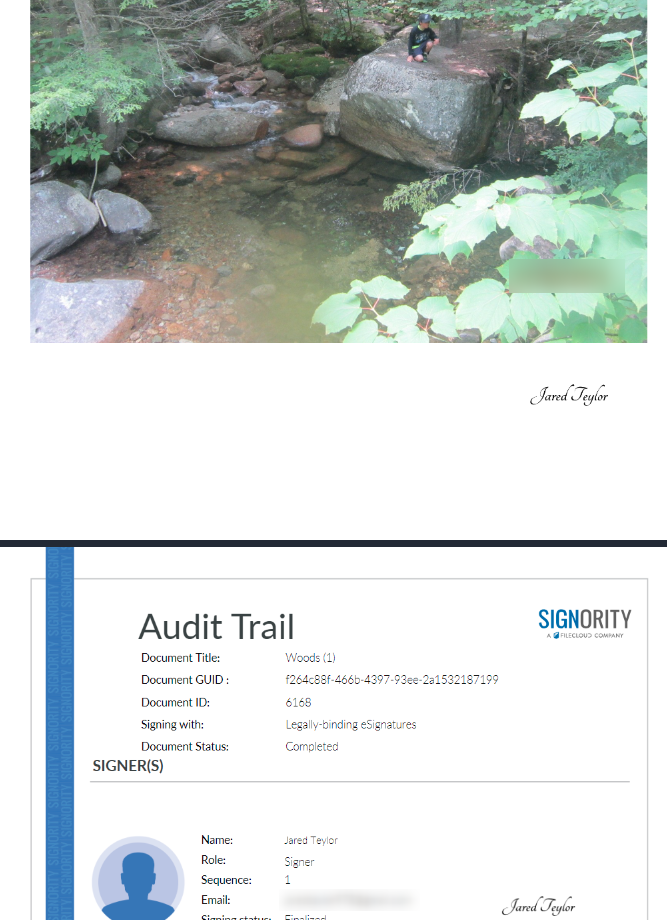
When audit details are attached to the eSignature document, the audit information follows the signature file in the eSignature pdf:
The options for receiving audit details are the following:
|
Setting code |
Description |
|---|---|
|
100 |
No audit details (default) |
|
101 |
A separate audit file is sent to the destination with the eSignature document. |
|
102 |
eSignature: Audit details are attached to the eSignature document.
|
To change the audit details setting:
-
Open the cloudconfig.php file
Windows Location: XAMPP DIRECTORY/htdocs/config/cloudconfig.php
Linux Location: /var/www/html/config/cloudconfig.php -
Add the following line, setting the value according to the codes specified above.
define('TONIDOCLOUD_ESIGNATURE_DEFAULT_AUDITTRAIL_SETTING', '101');
When the files are accessed from the Email notifying the requestor that the file has been signed:
By default, in the email notifying a signature requestor that an eSignature document has been signed, a link to the signed document is included.
For Signority users, if there is an audit details file, by default the email includes separate links to the signed file and the audit details file.
Signority users may sign in to Signority and configure whether or not the audit trail is sent as well as whether multiple signed documents are combined into a single PDF.
To specify in Signority what is included in the email notifying the requestor that the document has been signed:
-
Log in to Signority.
-
In the Signority navigation panel, click Admin, and then click Settings > Global Settings.
-
In Global Settings, locate Notifications settings and configure options for the requestor notification email.