.svg)
Active Directory (AD), single sign-on (SSO), and data leak prevention (DLP) features are only available in some versions of FileCloud Online.
Follow the steps in this guide to start sharing and syncing your files through the FileCloud Online service.
Begin by registering for a trial version and exploring FileCloud with the sample users and files we provide you with. Then create your own components to see how FileCloud Online works with your specific use case.
1. Register
We host the FileCloud site for you.
|
2. View and Add User Accounts
User accounts let employees in your company access the FileCloud Online user site so they can share and sync files. When you begin the FileCloud Online trial, your user account with the username sent to you has been added to the system for you. The password for this account is the password you specified when you created it.
-
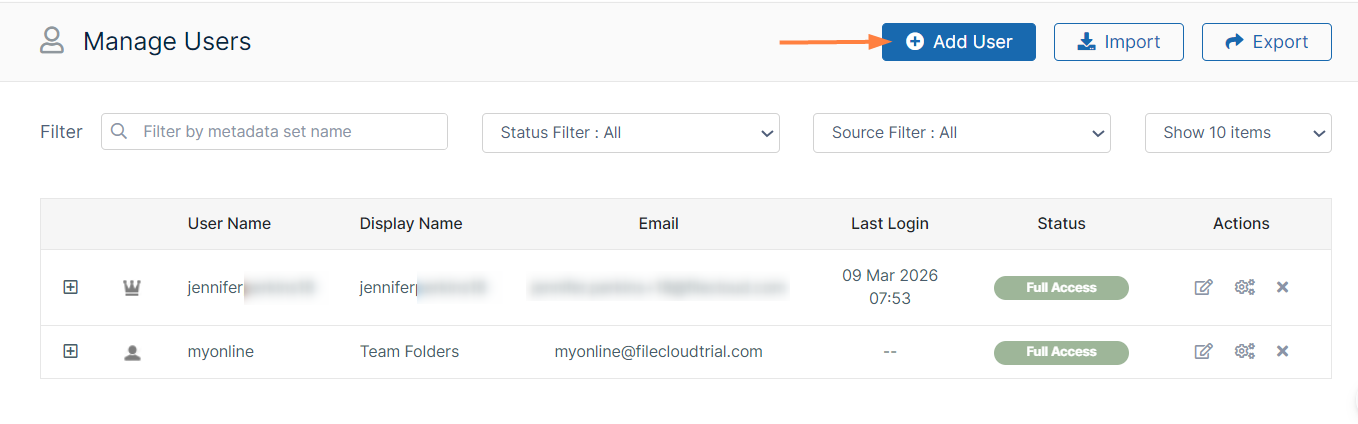
To view the user account, log in to the Admin portal with your user account or email address, and click Users in the navigation panel.
The Manage Users screen shows your user account and the Team Folder account. The Team Folder account has the subdomain name you entered when you chose your URL.
Your user is an admin user, which means in addition to logging in to the user portal, you can log in to the admin portal and perform admin functions. Your user account has access to all administrative functions. -
Add additional user accounts and see what users with different levels of permissions can do. See User Account Types for more information about user permissions.
Add users to FileCloud
The default user storage quota for every new user is set in Managed Storage. See Setting up Managed Disk Storage
To create a FileCloud user with default authentication:
-
Log on to Admin Portal.
-
In the left navigation panel, click Users.
-
In the top right corner, click the Add User.
-
Set the required account information.

Settings
Description
Authentication
Allows you to select the authentication type for granting access into the system.
-
Default Authentication - creates a local user account. User credentials are stored and authenticated within FileCloud.
-
Active Directory or LDAP - creates an external user account. User credentials are stored and authenticated from an external LDAP or AD server.
Access Level
Allows you to select the user type. A user account with Full or Guest access counts as a license.
User name
Name to be used to log into the system.
By default, User name can only contain numbers, spaces, hyphens, periods, underscores, and letters from the Latin alphabet (A-Z, uppercase and lowercase). Email addresses may not be used as usernames, but they may be used to log in to the user portal
Note: To also enable use of apostrophes in the User name, go to Settings > Admin and check Allow Email as Username.Display name
Name that appears on user interface.
Password
Password for the user (Should adhere to password length and strength requirements for your organization). Either enter a password here, or check the following box.
Generate password automatically and email to user
Have FileCloud generate a password according to your settings for password limitations, and email it to the user. Anything entered into the Password field is ignored.
Email
An email id that is unique in the FileCloud system
Send Email Notification
When checked, a welcome email is sent to the new user. Unchecked by default.
If you uncheck this, you can send a welcome email with a newly generated password later. See Send Email from User Details. -
-
Click Create.
Also see:
Import a user account from AD or LDAP Service
Bulk creation of User Accounts from a CSV File
Managing Groups -
3. Configure Team Folders
Team Folders are an easy way to share files and folders among a team. When you begin the FileCloud Online trial, a Team Folders account and four Team Folders have already been set up for you.
To see your Team Folder account:
-
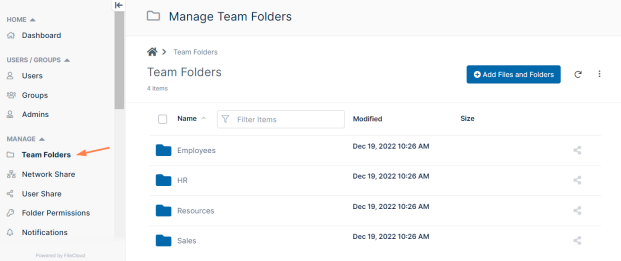
In the FileCloud admin portal's left navigation bar, scroll down and click Settings. Then, on the Settings navigation page, click Team Folders.
The Manage Team Folders settings page opens. -
Several sample Team Folders are already created for you.
-
Hover over any of the Team Folders, and click the share icon:
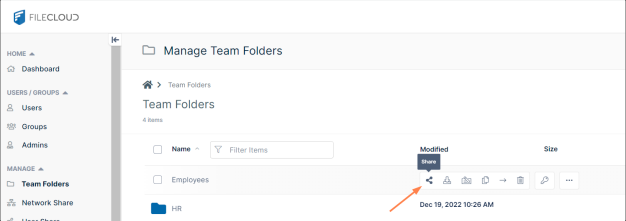
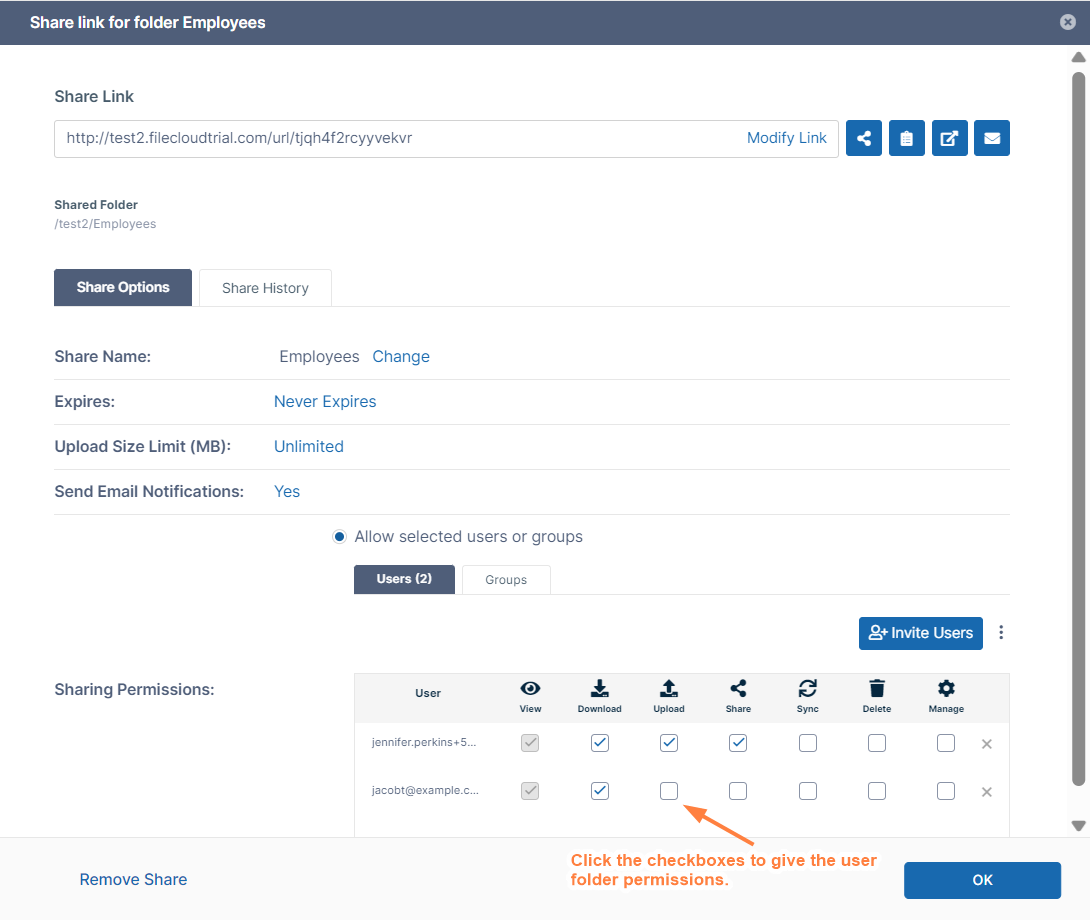
A Share link for folder dialog box opens and shows you which users the Team Folder are shared with and what their access to the folder is. The only user with access to the Team Folders when you begin using the FileCloud trial is your user account.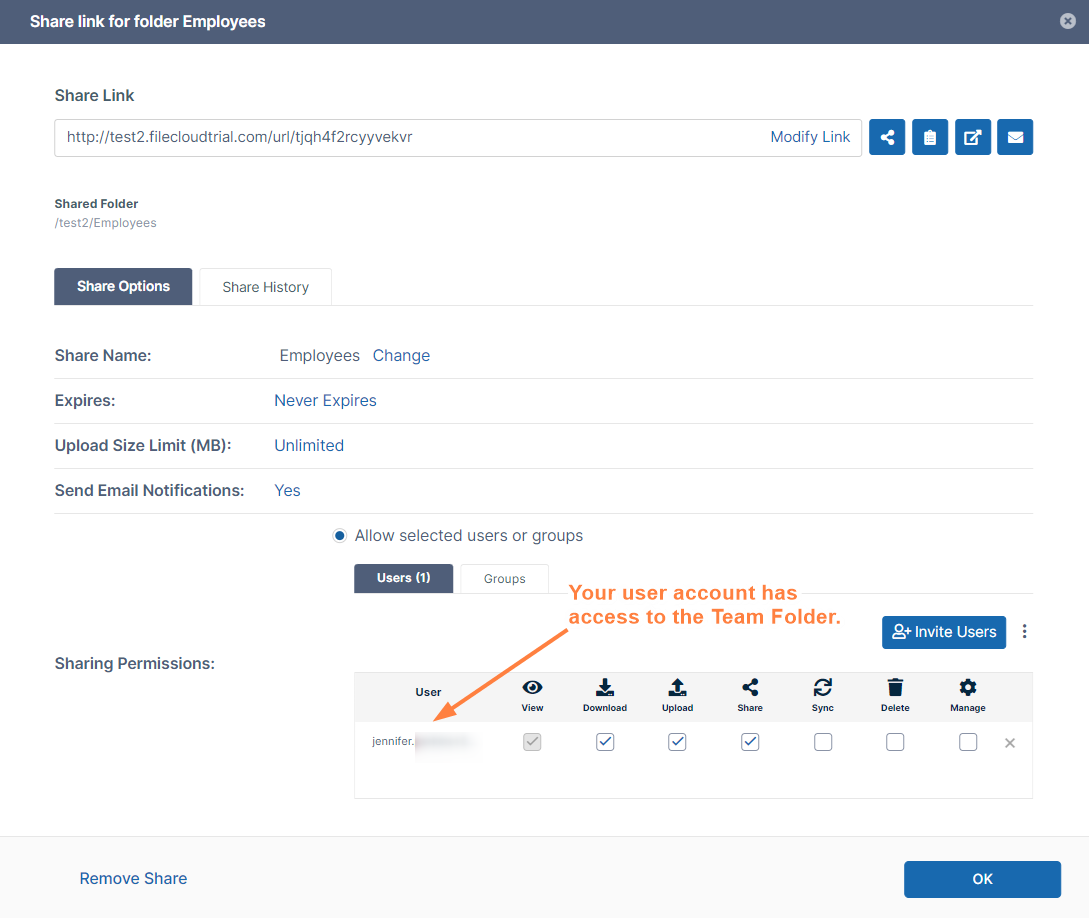
If you log in to the user portal using your user account, you'll see that your account has access to all four team folders. If you log in as the user you created above, you'll see that the new user does not have access to any Team Folders. -
Share the folder with your new user.
-
In the Share link for folder dialog box, click Invite Users and add find the user in the search box.
-
Add the user to the share.
-
Check the permissions boxes to give the user permissions to the Team Folder.
-
-
Log in to the user portal as user you just created (or refresh the screen if you are already logged in).
Now that user’s screen lists Team Folders in the navigation panel and has access to the Team Folder you have just shared.
When you set up FileCloud to use with your users, you can set up your own Team Folders. See Seed and Organize Team Folder Data.
Also see:
Share Team Folder and Set Share Permissions for users and groups
Setting Folder-Level Permissions on Team Folders
4. Configure Security
Security means not only verifying the identify of someone who connects to a network resource, but also setting alerts to know when there are problems and setting permissions on folders shared on the cloud.
|
Administrator |
To manage security, choose how you want to secure your resources:
Manage Folder Level Permissions
|
To maintain your FileCloud Online site, see FileCloud Online Administrator Tasks.
5. Work in the User Portal
Once you have the site configured, you can log in to the user portal to see how your end users will experience FileCloud.
Go to https://[yourcompanyname].filecloudtrial.com and log in with the account and username originally sent to you.
For links to end user features available to FileCloud Online users, see FileCloud Online User Tasks
When you are ready to go live:
-
Contact your account manager to discuss pricing and next steps.
-
We'll remove any test components, but you can keep any that you'd like to use in your live system and continue to build from what you have already created.
-
We’ll change your site address from https://<yourteamname>.filecloudtrial.com to https://<yourteamname>.filecloudonline.com